Banner Self Service for Faculty
From Help Wiki
for faculty and staff
Getting Started
- Faculty: go to my.evergreen.edu and log in
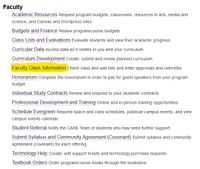
- Select Faculty Class Information (See Figure 1)
- Select Class Lists and Waitlists from the Faculty Self-Service Dashboard
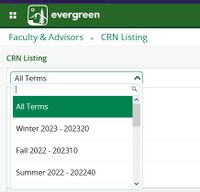
- You may choose the term you want to work with, or select the course from the list of All Terms (See Figure 2)
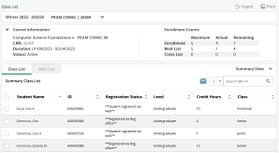
- To see your Class List for the selected class, click on the white space near the Course Title. (See Figure 3)
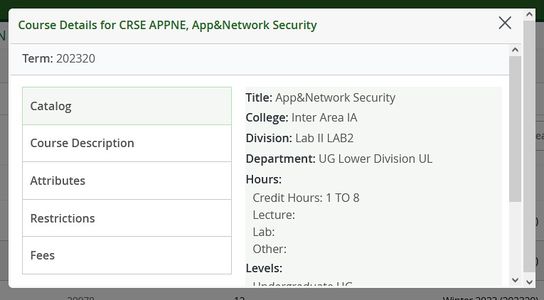
- To see a brief summary of that course in the Course Detail card, click on the Course Title. (See Figure 4)
Class Information
(See Below) Use this page to view summary information for your course or program including:
- Provides summary of all CRNs (Course Reference Numbers) associated with faculty
- Course Information
- Enrollment counts
Course Detail Card
(See Figure 4) Use this page to view summary information for your course or program including:
- Course Information
- Attributes and Restrictions
- Course-Specific Fees
Class List
- The most up to date list of enrollment
- Provides an enrollment overview with enrollment, cross list, and wait list totals (See Figure 5)
- Class List Tab provides the following information about each registered student:
- Name
- Student ID
- Class Standing
- Number of credits in course
- Registration Status- information on how the student was registered
- Degrees pursued
- Admission term
- Evergreen email address
- Wait List Tab provides the following information about each wait listed student:
- Name
- Student ID
- Class Standing
- Wait list position
- Degrees pursued
- Evergreen email address
Emailing Students
From the Class List page you can send e-mail to an individual student and to the whole class.
- Navigate to Class List in Banner Self-Service
- Select the entire list by click the check box by Student Name
- To select only part of your class list, click the check mark by the names you want to include
- At the top right of list, click the Blue Envelope
- This will open a new tab in your web browser where you will be logged in to your Evergreen email, and populate the bcc field with all of the students' preferred email addresses.
Registration Approvals/Overrides
Reminder: Only the program coordinator can give an override for an offering.
- Choose Registration Overrides from the Faculty Self-Service Dashboard
- Choose the term
- If you have the student's A#, enter it in the Student or Advisee ID field
- If you need to search for a student instead, use the Last Name and First Name fields- make sure the Search Type is set to Both. (See Figure 6)
- Hit Submit to search
- Click on the student's name
- On this page, you will be able to see all approvals given to the student for the term selected, as well as details about what they are currently registered for
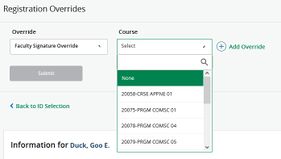
- Select Faculty Signature Override from the Override drop down menu (See Figure)
- Select the course you are giving approval for in the Course drop down menu (See Figure 7)
- To give a student multiple approvals at the same time, click the Add Override button and follow steps 8-9 again
- Hit Submit.
- You will see a message in the top right corner of your screen, telling you if the approval was saved or there was a problem.
- To change to a new student, select Back to ID Selection directly under the Submit button

