Adding a Campus Printer - Windows

Overview
There are 4 parts to this guide and each part includes several smaller steps. Follow the instructions step by step to add the printer to your computer. If you get stuck, you can contact support@evergreen.edu or submit a support request at help.evergreen.edu.
Part 1: Gather Required Information
Gather the following information for the networked printer you will be adding:
- Print Server name.
- At the time of this writing, the name is: SHELTIE
- Print queue name:
- Campus printers should have a label adhered to them indicating the queue name. Usually, this is the printer's location and model.
- For example: HELPDESK_8600
- Printer location:
- Office or area where the printer is located. Library, Helpdesk, Payroll, etc.
- Printer model:
- Located on the printer itself.
- Examples: Canon C3530i, HP 8600, etc.
- (OPTIONAL) Printer features:
- Features can be found by performing a quick google search with the printer’s model. Examples: Duplex, Collated, Tray 2, etc. (You can ignore features you will not use)
Part 2: Connecting to the Server
Campus printers are accessible via a server. Follow these steps to connect to this server.
- Open your file explorer.
- Go to "\\print-server-name". Click in the address bar of the file explorer. Type "\\" followed by the name of the server (refer to Part 1: Step 1) and press enter.
- Ex: "\\sheltie"
- TIP: Make sure to type backslashes "\\" as forward slashes won't work. This should give you a list of printers like this:

Part 3: Connecting to the Printer
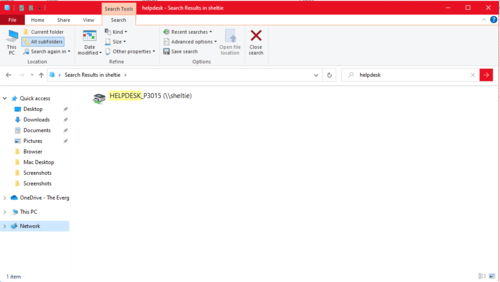
- Find the printer by the queue name (see Part 1.2). This can be done quickly by typing the queue name into the search bar located at top right of the file explorer window.
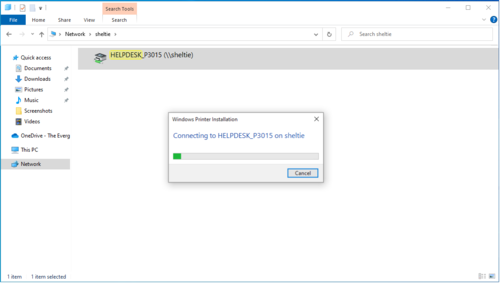
- Double click on the printer lab. This will automatically download the needed drivers and connect you to the printer.


Part 4: Test Your Connection
Now that you have installed your printer, print a test page to ensure everything works.
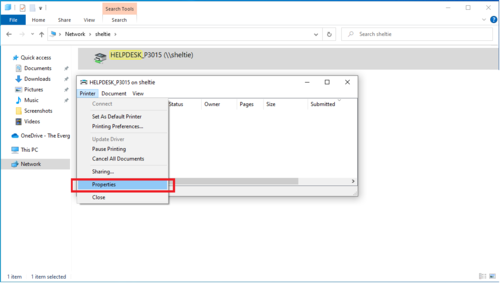
- Select 'Properties'. Upon connecting to the printer, the print queue will pop up. Under the printer menu, select 'Properties'.
- Print the test page. Towards the bottom right in the 'Properties' window, select the button labeled 'Print Test Page'.
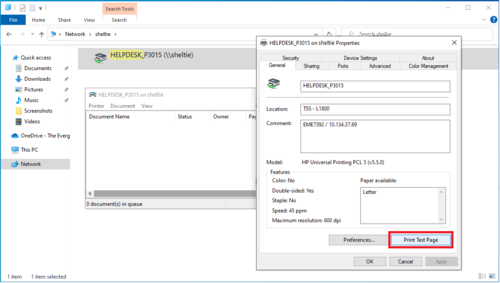
- Collect your test page. After some processing time, a test page should be printed. Check the page for errors to ensure the printer is working correctly.


Still Need Help?
If you’ve followed this guide but can’t get connected to the printer, reach out to "support@evergreen.edu" or submit a help ticket at help.evergreen.edu
Printing Help
Get Help
Submit a technology support request
No account or having problems logging in?
Request help as a guest