Making an Instrument Track with Pro Tools
From Help Wiki
Overview
This article describes making, playing, and recording an instrument track in Pro Tools.
- The Multimedia Lab (MML) has MIDI keyboards available, ask a lab aide.
- All other Audio Labs including the Mixing Benches have some kind of MIDI keyboard.
Creating an Instrument Track
- Open a new Pro Tools project. It is recommended to use the default template, which varies depending on the lab.
- The template does not have any instrument tracks load by default, so one needs to be created.
- Make sure the MIDI keyboard is connected. Most of them are powered via their USB connection, so if they are on, they should be working. Ask a lab aide for help, email audiosupport@evergreen.edu, or refer to a forthcoming HelpWiki article for MIDI controller troubleshooting.
- Under the Track drop down, select New.
- The New Tracks submenu will appear; use the drop downs to create a new mono or stereo Instrument track. Keep in mind that certain virtual instrument plugins might be picky about whether the instrument track is mono or stereo. For example, our Arturia instruments only work with stereo instrument tracks.

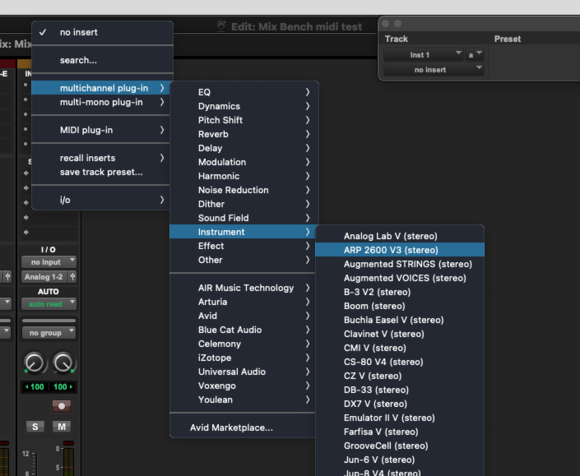
- The new Instrument track will appear. Click on one of the Inserts on the track to select your desired instrument.
- Now the chosen VST will pop up. Record arm the track to test if the MIDI controller is working. The record button should be flashing, and playing the MIDI keyboard should prompt the instrument to make sound. Warning: be aware of where the volume of any speakers you might be listening through is, and start with it turned down. It is easy to accidentally blast ears and speakers with unexpectedly loud bursts of sound.
- By pressing record, the instrument can be recorded just like an audio track, except MIDI events are captured on the timeline instead of audio waveform(s). From here, MIDI can be played back and further manipulated as needed.


