Parabolic Microphone Kit Gear Guide
Contents
Overview
The Telinga Parabolic Microphones are designed to be reliable, lightweight and very easy to use. The primary use of this parabolic microphone is wildlife audio recording. The dish funnels sound into the microphone, which allows for recording sources from farther distances.
If you would like to know more about why you would want to use a Parabolic Microphone setup and its pros and cons, Cornell's Lab of Ornithology has a helpful video discussing this item. How To Record Audio - Parabola
Kit Contents
- Omnidirectional Sennheiser ME62 w/K6 module
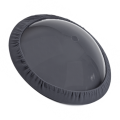
- Large 22” clear parabolic dish
- Zeppelin
- Pistol grip handle: equipped with adjustable XLR, shockmount, and stopper
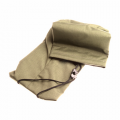
- Windcoat
- Dish bag
- Tripod mount
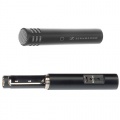
ME62/K6
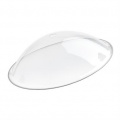
Dish
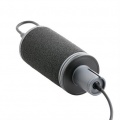
Zeppelin
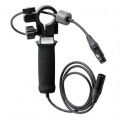
Pistol grip handle, Stopper & XLR
Windcoat
Dish Bag
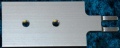
Tripod Mount


How to Use It
Dish
Store the dish with the opening down on a flat surface. Clean the dish only with soap and water. Do not use detergents. The dish can be rolled into a “cigar-like” shape with a diameter of about 6inches. If put on a flat surface and left for a while it will regain its shape. If the dish must be used instantly, however, you can make a cross of adhesive tape over the opening. After setting up the microphone, you can place the windcoat on the front of the dish for further wind protection.
Set up:
- Line the zeppelin up with the circular opening on the dish on the concave side.
- Place the other half of the zeppelin (the grey tube) on the opposite side.
- Twist the tube until it screws into the zeppelin securely.
- Fasten the pistol grip handle onto the grey tube using the wing-bolt to loosen/tighten the opening accordingly.
Mic

NEVER load any microphone into the zeppelin by pushing the capsule end through the orange rubber triangle. In the forward method (explained below), with the microphone facing outward from the dish, the tip of the capsule should never extend through the triangle. The microphone should only be loaded through the back of the handle.
This parabolic microphone can be used one of two ways: with the microphone facing forwards or backwards. The different methods allow for various sound styles.
Forwards

This is the “old way” to use a parabolic mic. In this traditional way, the mic capsule will point outward from the dish. The mic should not extend past the orange rubber triangle at the front of the zeppelin. The stopper prevents unwanted noise from travelling through the tube. It cannot be used in the forwards method with the include mic, as the mic is too long and shouldn’t extend past the zeppelin.
Set-up:
- With the capsule facing forwards (outwards from the dish), insert the mic into the back of the handle/tube.
- Push the mic into the zeppelin. Do not let it extend past the orangle triangle at the front of the zeppelin opening.
- Connect the XLR to the back of the microphone and attach to recording device.
Backwards
The “new” way to use this mic. The mic capsule can be loaded in the zeppelin the opposite way, with the capsule pointed backwards toward the dish. Do not load the mic in through the front of the zeppelin – as with the other method, the mic should always be loaded in through the back. Note: The stopper on the handle can only be used when the mic is loaded in backwards.

Set-up:
- Push the XLR into the zeppelin. This needs to be done before you insert the mic.
- With the capsule facing backwards (towards the dish), insert the mic into the back of the handle/tube. You can use the mic to push the XLR through the end of the zeppelin. The back of the mic should extend past the rubber triangle along with the XLR.
- Push the stopper into the back of the handle/tube. DO NOT FORCE the stopper against the capsule.
- Connect the XLR to the back of the mic. DO NOT STRESS THE XLR CONNECTION. Feed enough of the XLR through so that it isn’t pulled tight, but also so that there isn’t too much slack.

Placement method will be dependent on your audio recording needs. A good way to set your microphone up is to place a constant sound source (such as a radio), stand 80 feet away, point the microphone at the source and then make adjustments with the mic back and forth until you reach the strongest signal.
Using with a Tripod
The Telinga Universal Mk II has a tripod adaptor to connect the whole device to a tripod for a more stable recording environment.
Set-up:
- Loosen the knob (Not all the way) located at the top of the Zeppelin hand grip and then slide one of the fork like pegs located on the end of the adaptor into the Zeppelin (Pictured above and to the right).
- Tighten the knob. Make sure the plate is securely fastened to the Zeppelin - Be careful to make sure it doesn't wiggle or it could fall off the tripod and damage the equipment.
- Mount the adaptor onto a tripod plate and fasten the plate to the tripod. Make sure this is secure and cannot tip.
- Install the full Zeppelin and dish to the rig.
- Insert mic using one of the two ways mentioned above.


Make sure to remove tripod adaptor from the tripod before returning the equipment to Media Loan!
Media Loan Gear it Connects With Well
See the Media Loan Catalog for more info about the below items.
- Zoom H4n Audio Recorder
- Headphones
- Tripod