Saving to Your OneDrive - Windows

Which Method Should I Use?
- "I need to save a new file created in a Microsoft Office app like Word" >> Use Part 1
- "I need to save a new file from a Windows application" >> Use Part 2
- "I need to move a file I've already saved on my desktop into my OneDrive" >> Use Part 3
Part 1: Saving a New File from a Microsoft Office Application
OneDrive is automatically integrated with other Microsoft Office apps such as Word and Excel. Saving files to your OneDrive also enables Office apps to auto-save your work to OneDrive so you’ll always have access to the latest version of your documents.
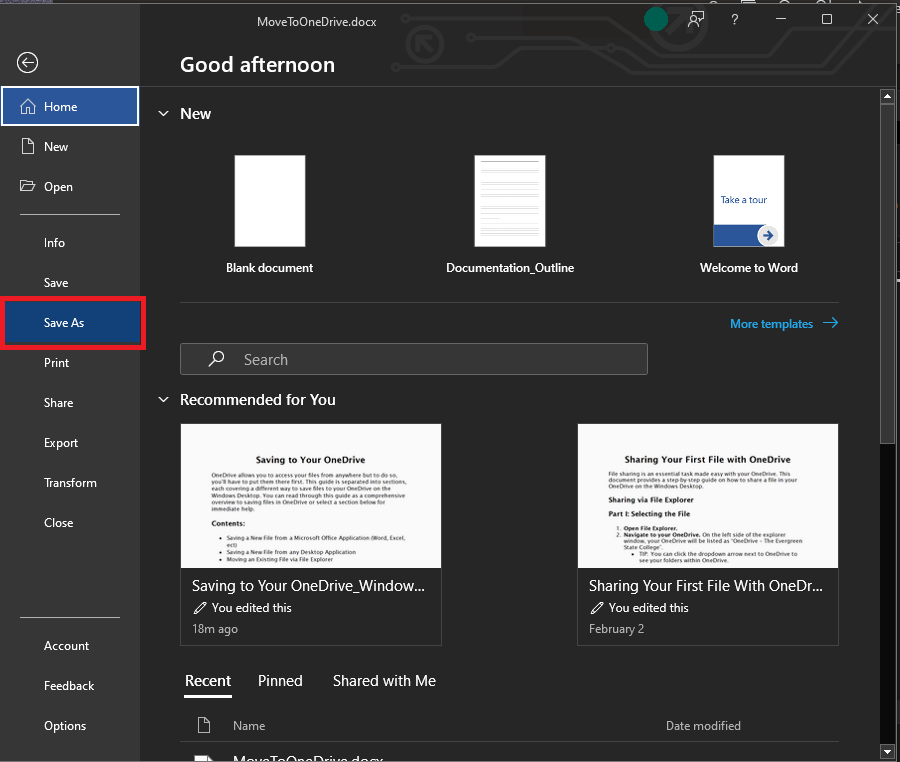
- Click "File" in the top left of your document window. This will open the file menu.

- Click "Save As" in the left menu of options to open the Save As menu.

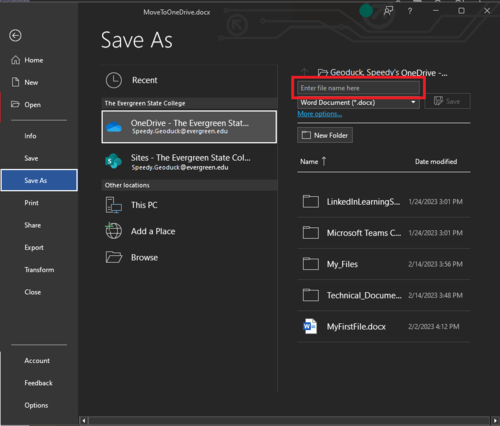
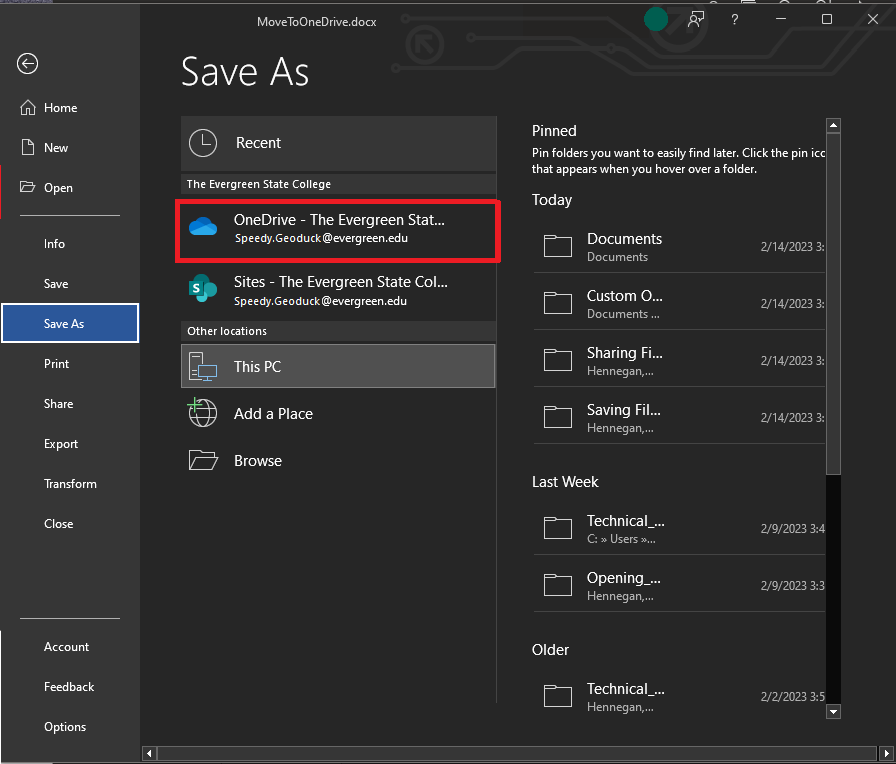
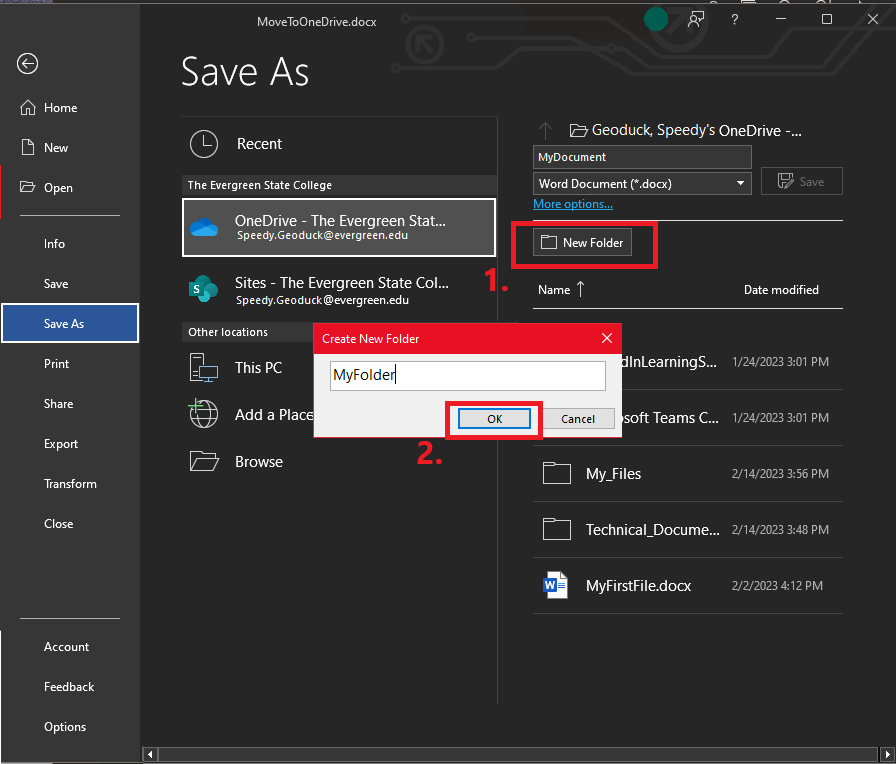
- Click "OneDrive - The Evergreen State College" listed as the first option below the "Save As" title at the top. This should change the view of the rightmost section.

- Enter the file name. At the top of the right-most section, type the name of your file in the first text box labeled "Enter file name here".
- Navigate to OR Create Desired Location (Optional). You can keep yourself better organized by saving directly to folder locations in your OneDrive. Double-click folder names to navigate into them.
- Create a Folder by clicking the "New Folder" button. Enter the name of your folder and click "OK" to create the folder. Make sure to double-click into your newly created folder after.

- TIP: If you click into the wrong folder, you can back out by clicking the Up Arrow icon on the top of the left side of the file name text box.
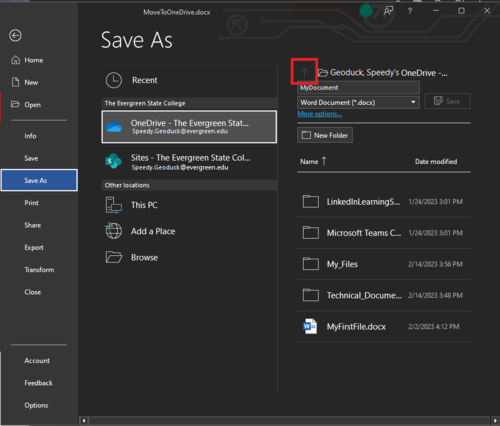
- TIP: If you click into the wrong folder, you can back out by clicking the Up Arrow icon on the top of the left side of the file name text box.
- Create a Folder by clicking the "New Folder" button. Enter the name of your folder and click "OK" to create the folder. Make sure to double-click into your newly created folder after.
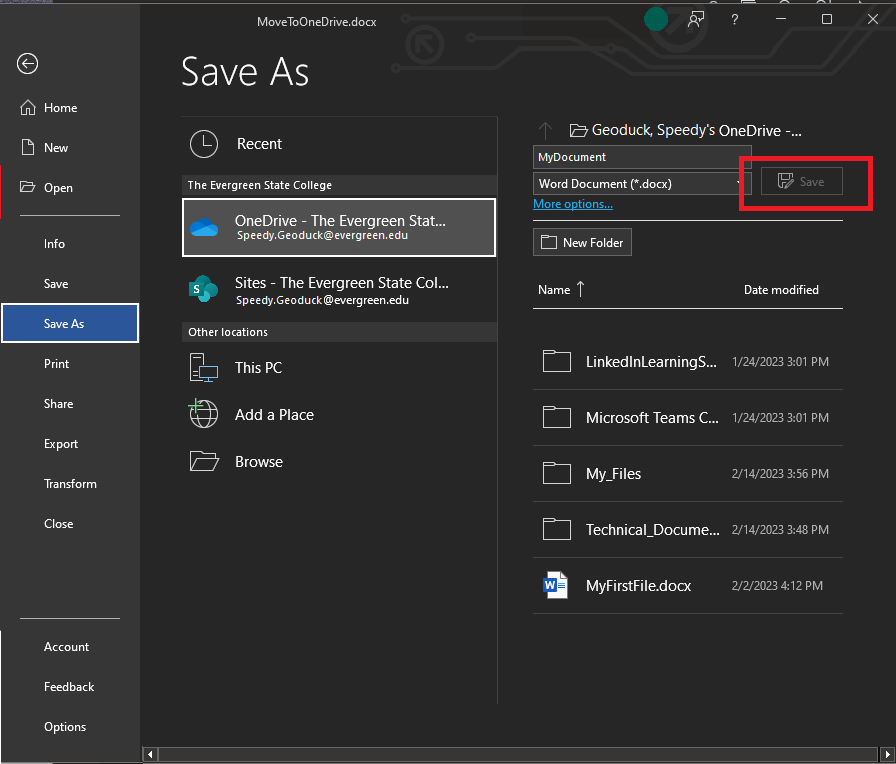
- Click "Save" button located to the right of the file name textbox at the top. The button has a floppy disk and pencil icon.


Part 2: Saving a New File from a Microsoft Office Application
You can save a file from any application in Windows directly to your OneDrive by using the File Explorer. While every application may look different, most follow a similar process detailed below. Note that examples photos were taken using the Paint application.
- Click "File" in the top left of your application window. This will open a menu.
- Click "Save As" in the menu that popped up. Usually, this option will be located near the top of the menu with an icon of a pencil on top of a floppy disk. In most application, this will open your File Explorer.

- Click "OneDrive - The Evergreen State College" listed in the left of File Explorer. You may have to scroll down to find it.
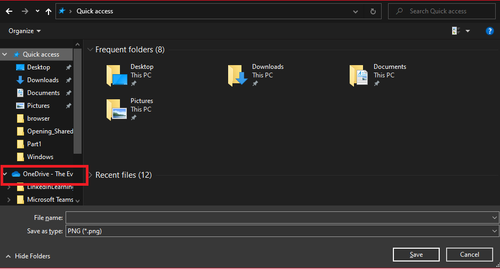
- Enter the file name. IN the text box near the bottom of the File Explorer window, type the name of your file.

- Navigate to OR Create Desired Location (Optional). You can keep yourself better organized by saving directly to folder locations in your OneDrive. Double-click folder names to navigate into them.
- Create a Folder by clicking the "New Folder" button located in the top left of the File Explorer window. Enter the name of your folder and press Enter to create the folder. Make sure to double-click into your newly created folder after.
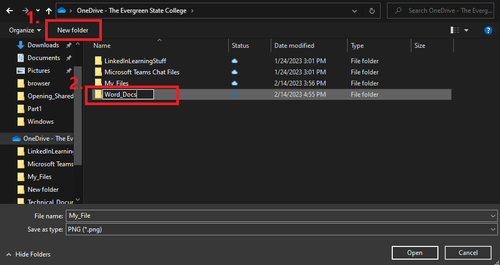
- TIP: If you click into the wrong folder, you can back out by clicking the Up Arrow icon located above the "New Folder" button.

- Create a Folder by clicking the "New Folder" button located in the top left of the File Explorer window. Enter the name of your folder and press Enter to create the folder. Make sure to double-click into your newly created folder after.
- Click "Save" button at the bottom of the File Explorer window.


Part 3: Moving an Existing File via File Explorer
For files already saved on your desktop, you can move them to your OneDrive using File Explorer.
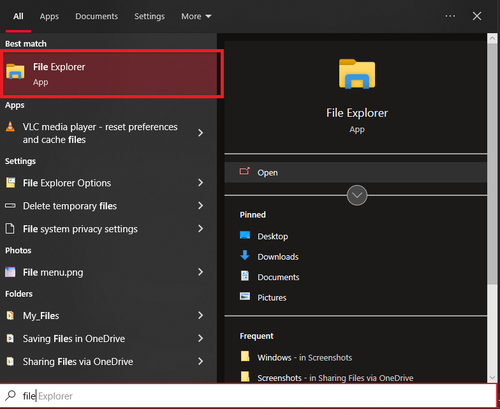
- Open File Explorer. If the application is not pinned to your taskbar, you can search "File Explorer" in your start menu.
- Navigate to your file. Find the file you want to move by navigating to it in your File Explorer. If you are unsure where this file is, you can look it up using the search bar (steps 2.a and 2.b) If you can find your file without the search bar, skip to step 3.
- Type the file name into the search bar located towards the top right of the File Explorer window and press Enter.

- Click the "Home" tab located in the top left of the File Explorer window.
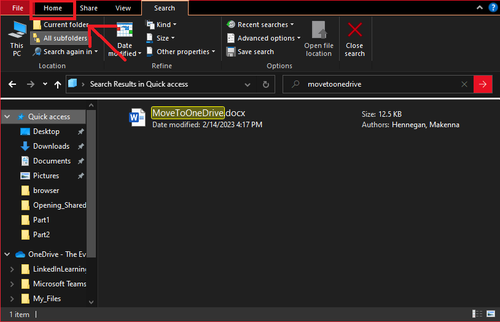
- Type the file name into the search bar located towards the top right of the File Explorer window and press Enter.
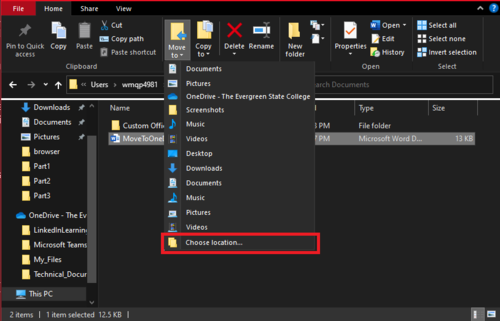
- Select the File you wish to move by clicking on it once. This should highlight the file name entry.
- TIP: You can also move folders this way if you select a folder instead of a file!
- TIP: You can also move folders this way if you select a folder instead of a file!
- Click the "Move to" button in the tool bar at the top of the File Explorer WIndow. The button icon is a folder with a blue arrow pointing left on top. Selecting this icon will open a menu.

- Select "Choose Location" at the bottom of the menu. This will open another window labeled "Move Items".
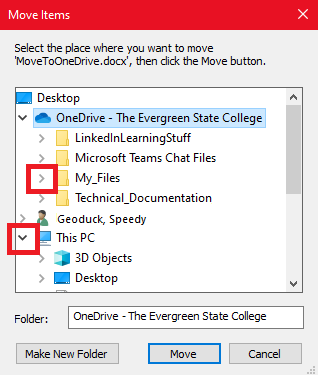
- Select "OneDrive - The Evergreen State College" from the list by clicking once. This should also list the folder structure within your OneDrive.
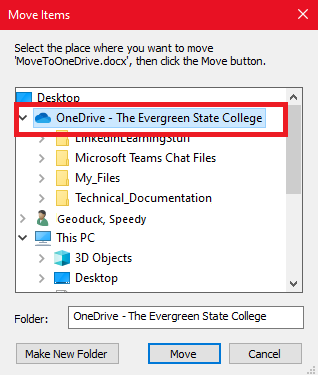
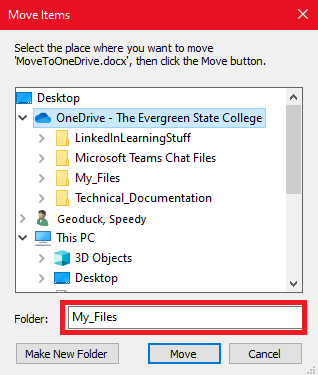
- Navigate to OR Create Desired Location (Optional). You can keep yourself better organized by saving directly to folder locations in your OneDrive. Click folder names to navigate into them until you find the one you want. You can also create new folder locations in your OneDrive while in the "Move Items" window.
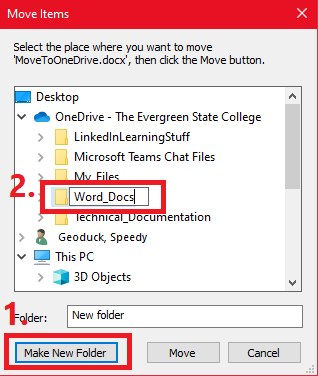
- Create a Folder by clicking the "Make New Folder" button at the bottom. Enter the name of your folder and press Enter to create the folder. Make sure to double-click into your newly create folder after.
- TIP: If you click into the wrong folder, simply click the correct folder to change locations.
- TIP: Click right arrows besides a folder name to show the list of folders within. Or, click down arrows to collapse a list of folders.
- Create a Folder by clicking the "Make New Folder" button at the bottom. Enter the name of your folder and press Enter to create the folder. Make sure to double-click into your newly create folder after.
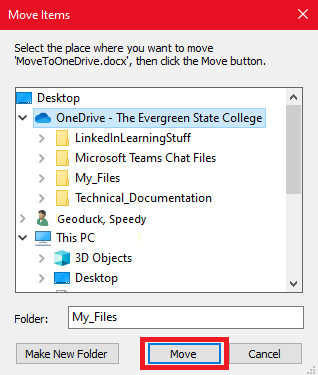
- Verify the Folder Location by checking the text box besides "Folder:" at the bottom of the window. The text box should contain the name of the folder you wish to move your file to.
- Select "Move" button located at the bottom to move your file.


Still Need Help?
If you’ve followed this guide but have further questions, reach out to support@evergreen.edu or submit a help ticket at helpwiki.evergreen.edu
Get Help
Submit a technology support request
No account or having problems logging in?
Request help as a guest