Difference between revisions of "Visual Editor - Mediawiki"
From Help Wiki
m |
m (→Getting started: the visual editor's toolbar) |
||
| Line 12: | Line 12: | ||
===Getting started: the visual editor's toolbar=== | ===Getting started: the visual editor's toolbar=== | ||
[[File:Mw-ve-toolbar.png]] | [[File:Mw-ve-toolbar.png]] | ||
| − | |||
| + | The visual editor's toolbar appears at the top of the screen when you begin editing. It includes some familiar icons: | ||
===Saving changes=== | ===Saving changes=== | ||
Revision as of 10:34, 28 March 2017
Contents
- 1 Opening the visual editor
- 2 Getting started: the visual editor's toolbar
- 3 Saving changes
- 4 Editing links
- 5 Editing images and other media files
- 6 Editing images
- 7 Uploading images
- 8 Editing media galleries
- 9 Editing lists
- 10 Editing tables
- 11 Editing categories
- 12 Editing page settings
- 13 Switching between the visual and wikitext editors
- 14 Keyboard shortcuts
Opening the visual editor
- First make sure you're logged in using your evergreen.edu username and password
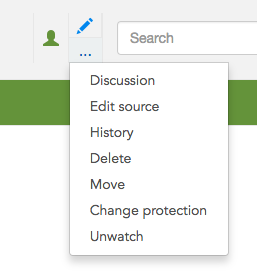
- To edit a page using the visual editor, click on the "Edit" icon at the top of the page.
- Note: It can take a few seconds for the page to open for editing, and longer if the page is very long.
- Clicking on the page options icon "..." is where you can access the "Edit source" tab will open the classic wikitext source editor
Getting started: the visual editor's toolbar
The visual editor's toolbar appears at the top of the screen when you begin editing. It includes some familiar icons:


