Difference between revisions of "Tutorials Style Guide"
From Help Wiki
(→Formatting conventions) |
(→Writing guidelines) |
||
| Line 9: | Line 9: | ||
===Formatting conventions=== | ===Formatting conventions=== | ||
| − | + | ====Navigation Sequence==== | |
| − | + | When indicating navigation in the application use bold text and the '''>''' to indicate navigational sequence <br /> | |
| − | + | ||
'''Example:''' | '''Example:''' | ||
# Click '''Go > Connect to Server ''' | # Click '''Go > Connect to Server ''' | ||
| − | + | ====Variable text==== | |
| − | + | Use italics for text that should be replaced by user specific information <br /> | |
| − | + | ||
'''Example:''' | '''Example:''' | ||
# Enter your ''username'' | # Enter your ''username'' | ||
| Line 23: | Line 21: | ||
===Page layout=== | ===Page layout=== | ||
* Usage of section headers must be consistent | * Usage of section headers must be consistent | ||
| − | |||
| − | |||
| − | |||
==Example structure for tutorials== | ==Example structure for tutorials== | ||
Revision as of 11:54, 24 October 2007
This style guide is intended for use in the development of workshop/application tutorials in the computing wiki.
Contents
Writing guidelines
Technical writing best practices
- Remove the chattiness
- Use clear and concise language
- don't use "you"
- Start each step with a verb if possible. What is the person doing specifically?
Formatting conventions
When indicating navigation in the application use bold text and the > to indicate navigational sequence
Example:
- Click Go > Connect to Server
Variable text
Use italics for text that should be replaced by user specific information
Example:
- Enter your username
Page layout
- Usage of section headers must be consistent
Example structure for tutorials
Title of tutorial "chunk" (level 2)
Brief overview to orient what is being done in this section. May not always be necessary.
Subheading (level 3)
Brief overview to orient what is being done in this section. May not always be necessary.
- Numbered step
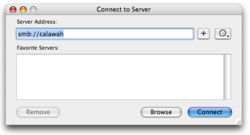
- Numbered step with link to larger version of figure graphic. Figure 1
- Numbered step
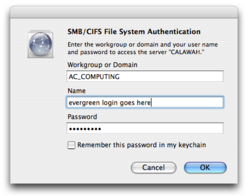
- Numbered step with link to larger version of figure graphic.. Figure 2
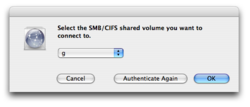
- Numbered step with link to larger version of figure graphic. Figure 3
- Embedded images work well when small

Subheading (level 3)
Brief overview to orient what is being done in this section. May not always be necessary.
- Numbered step. Use bold text when indicating menus for clicking, i.e. Go > Connect to Server.
- Urls should be written out fullyhttps://studentfiles.evergreen.edu


