Difference between revisions of "Creating A New Layer"
From Help Wiki
m |
m |
||
| (2 intermediate revisions by the same user not shown) | |||
| Line 4: | Line 4: | ||
===To create a new layer:=== | ===To create a new layer:=== | ||
| + | #On the right hand side, there should be a tab labeled ''''Layers'''.' Usually it is the last box on the tool bar.<br> | ||
| + | #Click the second to last icon. It should look like a page, and sits right next to the trash can icon.<br> | ||
| + | #A new layer will appear in the Layers tab.<br> | ||
| + | [[Image:new-layer-2.gif|right]]<br><br> | ||
| − | + | ===Other options to create a new layer:=== | |
| − | + | #Go to '''Layer''' > '''New''' > '''Layer'''<br> | |
| − | + | #On a PC; press '''Ctrl+Shift+N''' -- On a MAC; press '''Command+Shift+N''' | |
| − | + | ||
| − | + | ||
| − | + | ||
| − | + | ||
| − | + | ||
[[category:Photoshop]] | [[category:Photoshop]] | ||
Latest revision as of 09:34, 24 May 2013
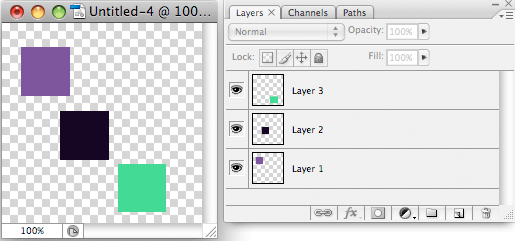
Layers in Photoshop make editing different sections of an image easier. So for example, if one has a picture of three squares, each square could be on its own separate layer. This way, editing one square (say by like, moving it ten pixels to the left) won't also move the others.
To create a new layer:
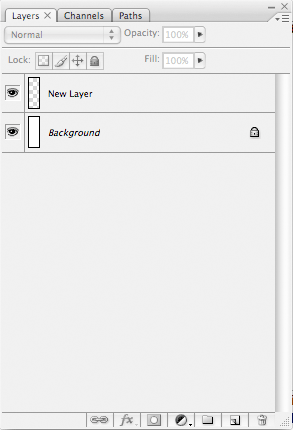
- On the right hand side, there should be a tab labeled 'Layers.' Usually it is the last box on the tool bar.
- Click the second to last icon. It should look like a page, and sits right next to the trash can icon.
- A new layer will appear in the Layers tab.
Other options to create a new layer:
- Go to Layer > New > Layer
- On a PC; press Ctrl+Shift+N -- On a MAC; press Command+Shift+N


