Difference between revisions of "Sound Design in Digital Performer"
| Line 34: | Line 34: | ||
<br> | <br> | ||
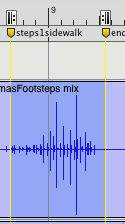
a. Use your curser to highlight between markers to make your looping selection. | a. Use your curser to highlight between markers to make your looping selection. | ||
| − | + | ||
[[File:SFX Loop.png]] | [[File:SFX Loop.png]] | ||
<br> | <br> | ||
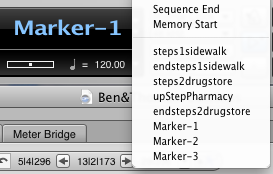
| − | + | b. In the '''Marker Menu''', move the playhead to the beginning of your loop point by selecting your beginning marker name. | |
| + | <br> | ||
| + | <br> | ||
[[File:SFX Marker Selection.png]] | [[File:SFX Marker Selection.png]] | ||
<br> | <br> | ||
Revision as of 09:34, 22 May 2012
Sound Effects Looping using Digital Performer
Project > Movie > open your movie
a. expand the mini menu in your movie and select:
> movie floats on top
> copy movie audio to sequence
b. Turn down volume in the movie window, bottom left.
While watching your movie:
a. place markers at the beginning and end points of your desired loop at the top of the
conductor track.
b. Name the marker by double clicking on the marker that is located inside the conductor track.

Project > Add Track > Mono Audio Track
a. open tracks to record onto
b. name these tracks apropriate to action or character.

Transport Window
a. Enable Memory Cycle:this places beginning and end points to your selection and loops in playback or in record modes.
b. Enable Link Selection to Memory:this places your memory cycle points while you select your audio.
c. Enable Overdub:this allows you to record while making new tracks in loop mode.

Looping:
a. Use your curser to highlight between markers to make your looping selection.

b. In the Marker Menu, move the playhead to the beginning of your loop point by selecting your beginning marker name.

