Difference between revisions of "COM 209"
From Help Wiki
(→Select Your Source) |
|||
| Line 13: | Line 13: | ||
# Aux 3 = Cassette | # Aux 3 = Cassette | ||
# Aux 4 = Front Panel Input | # Aux 4 = Front Panel Input | ||
| − | # Aux 5 = Stereo mini cable | + | # Aux 5 = Stereo mini cable for laptop or other devices |
===Volume=== | ===Volume=== | ||
Revision as of 10:08, 18 April 2014
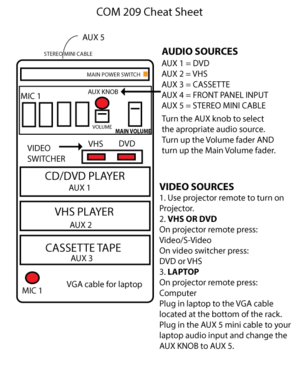
This is one of the main dance and performance studios in the communications building. It has a simple AV rack for audio playback. The Video Projector is not yet installed.
Power
- Turn ON the Main Power to the rack, big orange switch on the top right of the rack.
Select Your Source
Using the Auxiliary knob, select between the following sources:
- Aux 1 = DVD
- Aux 2 = VHS
- Aux 3 = Cassette
- Aux 4 = Front Panel Input
- Aux 5 = Stereo mini cable for laptop or other devices
Volume
- Push up the fader located underneath the Aux Knob
- Push up the Main Volume fader
Microphone
- Plug in a microphone to the MIC 1 input panel located on the bottom left of the rack
- Push up the MIC 1 fader to control the volume of the Mic (go slowly to avoid feedback through the speakers and do not point the microphone at the speakers)
- Push up the Main Volume fader

