Difference between revisions of "Medium Format Cameras Gear Guide"
m (Zornesn moved page Medium Format Cameras Operating Guide to Medium Format Cameras Gear Guide) |
|||
| Line 289: | Line 289: | ||
'''Caution: Avoid moving the self-timer while the flash sync is set at “M”. It may cause damage to the self-timer.''' | '''Caution: Avoid moving the self-timer while the flash sync is set at “M”. It may cause damage to the self-timer.''' | ||
| − | [[category: | + | [[category:APS Gear Guides]] |
Latest revision as of 11:34, 24 August 2023
A proficiency test is required to check out these cameras. Schedule a proficiency at the front desk of Media Loan or by calling 360-867-6253. Read this operating guide and complete the written portion of the Medium Format Cameras Proficiency Test prior to your scheduled proficiency. (You must already be proficient in the 35mm manual camera before obtaining this proficiency.) Bring your answer sheet with you to the test, which should take approximately 30 - 45 minutes.
Contents
Introduction to Medium Format
Medium Format vs. 35mm
This is an instructional guide to the medium format film cameras available at Media Loan. It will cover a brief introduction to medium format photography and then go through the operating steps for each of our models.
When talking about film photography, there are three main types of film, or formats: 35mm, medium format, and large format. With medium and large format, the frame size on the film is much larger than 35mm film and yields significantly more detail and the ability to be printed at very large sizes. In essence, it is a question of quality. The size and shape of the actual frame is variable depending on the camera (whether your picture is a square, rectangle, skinny rectangle, etc.) The size of the frame is often indicated in the name of the camera, like the Pentax 6x7 whose frame dimensions are 6cm by 7cm. With 35mm photography the size of the frame is always 35mm across regardless of the camera used.
Medium format film comes wrapped around a plastic spool with light-safe black paper layered around the film itself. There is no metal canister like with 35mm film. Additionally, when there are no more exposures left on the roll, medium format film is not rewound back on to the spool but is transferred to another take-up spool on the other side of the camera.
There are two types of medium format film, 120 and 220. The film is exactly the same except that 220 film contains twice the amount of exposures as 120. However, most medium format cameras can shoot only one or the other. The Pentax 6x7 and the Mamiya cameras have the ability to shoot both but the camera needs to be adjusted to the right setting prior to loading the film. 120 film is the most common and allows for 10-12 exposures depending on the camera’s aspect ratio. Keep in mind that the Photo Store and many other stores do not process 220 film.
Tools Required
In order to shoot on a medium format camera, you will need some accessories. Some are optional while others are not. The essentials include an empty film spool that your exposed film will be transferred on to (there should already be one in the camera from the previous user. If there isn’t, ask a Media Loan staff member to give you one.) You will also need a light meter as most of our medium format cameras do not have built in meters.
Refer to Media Loan’s operating guide for light meters to find out how to use what might be called your medium format camera’s best friend.
Other accessories include tripods, cable releases, and flashes. If using a flash, remember to also pick up a flash sync cable.
Precautions
These cameras are old, expensive, and used by many students. Please give them the respect they deserve. Before handling a camera, be aware of what can potentially damage it and what improper usage looks like.
Some general rules for these cameras are:
· Do not expose them to water or moisture. They are not weather proof.
· Do not leave in excessive heat, like in a car.
· Do not leave in excessive cold, like the freezer.
· Do not try to force any mechanism on the camera. You’re probably doing it wrong if it feels like a lot of force.
· Do not remove the prism viewfinder or the lens. This will get dust inside the camera.
· NEVER LEAVE ANYTHING FROM MEDIA LOAN IN YOUR CAR!
· As with all Media Loan equipment, you are 100% financially responsibly for any damage and repairs done to the camera.
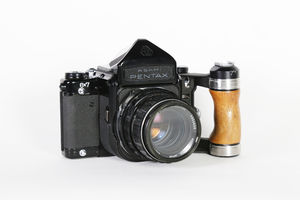
Pentax 6x7
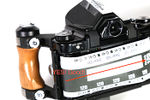
The Pentax 6x7 is perhaps the easiest to use of all our medium format cameras, as it most resembles the shape and operation of a 35mm camera. It is a single lens reflex (SLR) camera meaning that what you see through the viewfinder is the actual image that will appear on the film. This camera can shoot both 120 and 220 film. You will not be able to release the shutter until there is film loaded
Before Loading Film
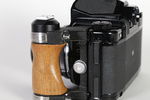
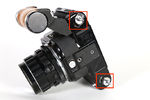
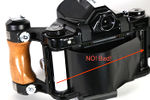
Firstly, be sure that the wooden handle grip is screwed on tight. All of the camera’s weight rests on this handle.
Then you need to set the film type you are working with, either 120 or 220. There are two places that need to be adjusted for this. If you’re holding the camera like you would
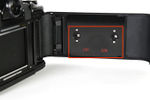
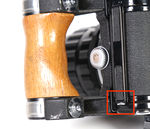
to shoot, the first is on the right side of the camera. There is a dial thatlets your choose between the two. You will need a quarter or a strong finger nail to move it. The second adjustment is found on the inside of the camera. Open the camera by pulling down on the silver release on the bottom left side of the camera. Notice the black speckled pressure plate on the door. Following the direction of the arrows there, gently push the pressure plate down and to the side that corresponds to your film type.
Loading Film
It is best to do this while sitting as these cameras do not come with neck straps.
- First, open the back of the camera if it is not already open from the previous step. On the bottom of the camera are two silver dials that hold the film spools in place.
- Fold out their handles and turn these counter-clockwise and pull them up until the stay put. Make sure your empty take-up spool is on the right side. If there is no spool in the camera, ask a Media Loan or Photoland staff to give you one. (It is common medium format etiquette to leave your old spool in the camera
3. After you’ve aligned the cross in the top of the film spool with the notch in the camera, close the silver dials on the bottom of the camera.
4. Pull the film across to the right side of the camera and thread the film into the take-up spool just as you would with 35mm film.
5. Use the crank lever to advance the film and stop when the arrows on the film paper line up with the arrow on the inside of the camera.
6. Close the back of the camera and advance the film until “0” is line up with the red dot in the frame counter.
Exposing, Focusing, & Taking a Picture
The shutter speed is set by the dial on the top left side of the camera. The current setting is indicated by whatever number is next to the small red LED just to the right of the dial. Since there is no built in light meter on this camera, there is no need to set the ISO for whatever film you are using.
If using a flash, you must use a shutter speed on this camera of 1/30th of slower.
If you wish to do a timed exposure longer than one second and you don’t want to keep you finger on the shutter as the “Bulb” setting would allow, rotate the shutter speed dial to anywhere between the red “X” and “1000.” Now, releasing the shutter will keep it open until you rotate the shutter speed dial back to “X”.
The aperture ring is located on the lens. This is the ring closest to the body of the camera and ranges from f/2.4 to f/22. The aperture ring will be your primary tool for exposing. Also located on the lens is an aperture preview mechanism. This allows you get see your depth of field before actually taking a picture. You can lock this switch in "AUTO" mode so that you will always be previewing your aperture. To do this, slide the switch to "AUTO" and push down. To release it back to manual, push down on the other side of the switch.
To focus, simply look through the viewfinder and adjust the focus ring until the split viewfinder is even and the image looks crisp.
To release the shutter and take a picture, first crank the film advance level with your right thumb and smoothly and firmly depress the silver button next to the crank.
A cable release can be attached by screwing one into the shutter release button just as with Media Loan's 35mm Pentax K-1000 cameras.
The Pentax 6x7 can not take multiple exposure pictures.
Unloading Film
Once all of the frames are exposed you’ll want to unload your film. When you’re ready to do this, wind the crank a few more times until there is no more tension in the crank lever. By now the protective light-safe paper should be covering the film and totally wrapped around the spool. Unfasten the silver dials just like when loading film. Keeping a firm grip on the film so that it doesn't unroll, lick or peel off the sticky tape on the roll and make sure it is securely attached to the spool. Close everything back up.
Using a Flash
To use a flash with the Pentax 6x7, first attach the flash to the hot shoe mount on the handle. This camera has options for both X-type sync cables and FP-type sync cables. Use only the X-type as plugging an X cable into an FP housing can cause damage. Again, this camera can only use a flash when the shutter speed is set to 1/30th of a second or slower.
Bronica ETRS, ETRSI, & SQ-B
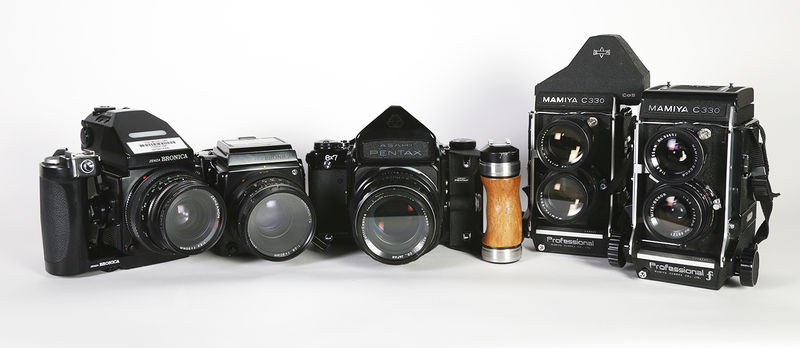
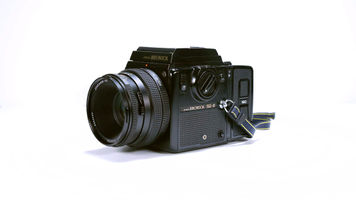
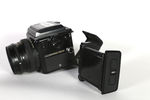
There are three different models of the Bronica available at Media Loan: SB-Q, ETRS, and ETRSi. They are very similar in operation except for a few minor things like button placement and the viewfinders and accessories that come with each camera. The aspect ratio that these cameras shoot at is also different.
- The ETRS and ETRSi have prism viewfinders and are in a 6x6 (square) format.
- The SB-Q (aka 645) has a wast-level view finder and is in a 6x4.5 (rectangle) format.
The Bronica begins to feel like a departure from the 35mm cameras. It is essentially a cube with a lens attached. One notices a very different feel when shooting with a Bronica than with the Pentax 6x7. Since a lot of the controls are not in conventional places, it may take some time to get acquainted with this camera. All of the Bronica cameras can only use 120 film.
Loading Film
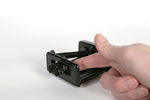
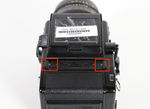
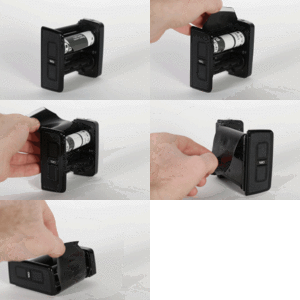
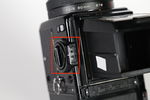
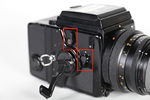
To load film, open the back of the camera by pinching the buttons that lie just under the viewfinder that are indicated by arrows. It is spring loaded and the film cartridge may fall out so be prepared. The outer shell will fold down and then the film cartridge can be removed.
In the Bronica, film moves from top to bottom. This means your new roll of film will be on top and your empty spool on bottom Now that you're holding the film cartridge, notice there are two door flaps on the left side. Using your finger, push them open from the inside out. You will now be able to remove or insert film spools into each slot. Make sure the empty spool is on bottom and the fresh film is on top. Now you will take the film leader and run it over the pressure plate on the opposite side, bringing it down and around to the empty take up spool. A proper loading will have the black side of the paper leader facing outwards over the pressure plate. Now, using the manual film advance wheel located on the right side of the cartridge, advance the film until the arrow on the leader aligns with the red arrow on the inside left of the cartridge.To close the camera, the cartridge must first be aligned properly on the camera body, not inserted into the door. Once the cartridge is in place, close the door. It can be a little tricky to get it perfectly aligned. Do not force anything. If the door won't shut, take the cartridge out and try again.
Now wind the film advance lever until it stops moving and the frame counter is at 0.
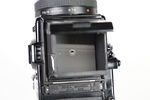
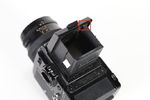
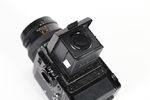
Waist-level Viewfinder
Many of Media Loan's Bronicas, like the Mamiyas, feature waist-level viewfinders. This is different than a prism viewfinder in which the viewfinder is held up to the eye. Alternatively, waist-level viewfinders are held at the waist and have a "screen" and magnifier for focusing. Most waist-level viewfinders open by simply folding up the top of the camera. Sometimes there is a small latch. There are metal walls that will snap into place once it is open.To open the magnifier for critical focusing, there is another release latch on the inside of the focusing hood. To close the magnifier, simply move it back into place with your finger, trying not to touch the actual glass.
Some of the Bronicas come with prism viewfinders, which you can ask for. Some of the prism viewfinders are electronic and feature an internal light meter.
Exposing, Focusing, & Taking a Picture
To set the shutter speed, there is a dial on the right side of the camera body. The Bronica has a range of shutter speeds from 1/500th of a second to 8 seconds.
The aperture is set by twisting the aperture ring on the lens and has a range of f/2.4 to f/22.
If you are using a Bronica with a built in light meter, set the ISO to match your film speed by twisting the dial on the left of the viewfinder. If it does not have an internal light meter, you do not have to worry about setting your ISO.
To focus, open the magnifier in the focusing hood as described in the previous section. The Bronica's lens functions conveniently like most other camera lenses. Twist the focus ring until your subject comes into focus.
Before taking a picture, the film must be advanced. Do this by winding the crank on the right side of the camera. When there is no film loaded in the camera, the crank will spin indefinitely. Once film has been loaded, the crank will stop itself in the correct position.
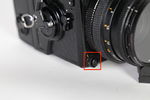
The shutter release button is a black button located on the front of the camera in the bottom left corner. You can attach a cable release by screwing one into the cable release hole on the left side of the camera.
It is preferable to take a picture in the steps in order to ensure a focused picture:
- Advance the film
- Set your shutter speed and aperture according to your light meter
- Focus on your subject
- Depress the shutter release button
Using a Flash
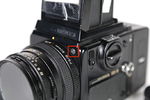
A flash can be connected using an X-type sync cable. The port for this flash is located on the front side of the camera in the top right corner. When plugging and unplugging a sync cable, always pull gently and straight out. Never use a twisting motion to get it out.
The Bronica can conveniently sync with flash at any shutter speed, even at its fastest of 1/500th of a second.
Multiple Exposure
The Bronica cameras can take multiple exposures, exposing a single frame an unlimited number of times.
To do this, first wind the crank to advance the film. There is a small lever next to the crank that needs to be rotated clockwise. A red warning indicator will appear in the viewfinder letting you know that the multiple exposure mode is engaged, however it is always wise to double check that this lever is in the left or counter-clockwise position (single exposure mode) prior to shooting. When the multiple exposure mode is set, the shutter can be cocked with the film advance crank an infinite number of times without actually advancing the film.
Mirror Lockup
The function of a camera's mirror lockup (also abbreviated MLU) is to reduce the potential for motion blur due to the movement of the mirror inside the camera. This movement will potentially effect photographs only when shooting at shutter speeds of 1/60th of a second or slower. Since the mirror that allows viewing and composing through the viewfinder before actually taking a picture is stuck in its upright position, you will no longer be able to use the viewfinder once the MLU function is engaged.
To engage this function on the Bronica, first advance the film with the crank. There is a lever located to the right of the multiple exposure lever. Move this lever counter-clockwise. You will know it is engaged when you can not see anything through the viewfinder.
There are three settings for the mirror lockup function. "N" for normal in which the mirror will not lock up, and "S" for single frame and "C" for continuous in which the mirror will be locked up.
If you are on your last exposure of the roll and the mirror lock up function is still engaged, the shutter will continue to release every 360 degree turn and will not advance the film as would usually happen after the last exposure.
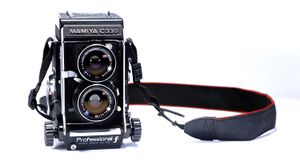
Mamiya C330 & C220
The Mamiya cameras at Media Loan are perhaps the least intuitive to use of the medium format cameras. Learning to use one properly, however, is well worth it for both high quality images and mad style points. Like large format cameras, the Mamiya uses bellows to focus. Instead of adjusting the elements of glass within the lens, like with lenses that can focus internally, bellows physically move the lens farther or closer to the plane of film in order to focus.
The Mamiya shoots square frames that are 2 1/4 inch long in each direction.
Before Loading Film
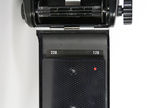
Like the Pentax 6x7, the Mamiya can shoot with either 120 or 220 film and the camera needs to be adjusted accordingly before loading film. First, adjust the orientation of the pressure plate on the inside of the camera to coincide with the kind of film you are using. To open the back of the camera rotate the silver locking disk at the top of the back side of the camera so that the red dot is pointing up and you can slide the disk in the direction of the arrow.
Because the Mamiya uses a twin lens system rather than being an SLR, you will also need to adjust the parallax adjustment to match whatever the focal length of the lens is you are using. This can be set by the outer ring on the main dial on the left side of the camera. Depending on the adjustment made and the distance of the camera from the subject, a bar will appear on the left side of the viewfinder. This is important to notice as it indicates the top of the frame and everything above the bar will be cut off on the actual film, even though it is present in the viewfinder.
Additionally, because the farther the bellows take the lens away from the film, light is increasingly lost along the way from when it enters the lens to when it reaches the film. Inside the viewfinder, the number that the moving bar lands at indicates in number of stops how much to increase the exposure by in order to compensate for the reduced light.
Loading Film
With the neck strap around your neck, open the back of the camera as indicated in the previous section. There are two spool release knobs on the left side of the camera. These pull out and will allow you to remove the film spools. Twist these knobs while pulling to lock them in their disengaged position. On the Mamiya, the film moves from bottom to top, opposite of the Bronica cameras move film. Accordingly, place the empty take up spool in the top compartment. Lock it in place. Then place your fresh roll of film in the bottom compartment and lock it in place.
Pull out the film leader from the fresh spool and bring it up to the empty spool and thread it into that spool. Once threaded, turn the film advance crank on the right side of the camera clockwise to advance the film leader until the printed arrow on the leader matches up with the start mark on the inside of the camera (located a little lower than half way down on the right side.)
Close the back of the camera by pushing firmly on either side of the silver locking dial. Once closed, turn the locking dial counter-clockwise to lock the back cover in place. Continue to turn the film advance crank clockwise until it won't turn anymore. Your shutter is now cocked and ready to take a picture.
Exposing, Focusing, & Taking a Picture
The Mamiya is slightly different than other cameras in that both the aperture and shutter speed are set on the bottom lens. There are individual rings for each of these settings. The aperture can be set by moving the little black handle on the left side of the lens and the shutter speed can be set by twisting the knob with fractions of a second on it. Do not change the shutter speed after the shutter has been cocked.
The aperture ranges from f/2.8 to f/22 and the shutter speed ranges from 1/500th of a second to 1 seconds.
Since the Mamiya does not have an internal light meter there is no need for an ISO setting. The camera does however allow you to set the ISO of the film you are using on the dial configuration on the right side of the camera. This does not effect the performance of the camera at all but simply serves as a reminder for the kind of film you are shooting. Be sure to also check out a light meter from Media Loan when checking out a medium format camera.
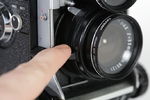
Like the Bronica, most of Media Loan's Mamiyas feature waist-level viewfinders although some of them come with prism viewfinders. You can request either when checking one out. Also like the Bronica, the Mamiya has a magnifier seated within the focusing hood that can be expanded for critical focusing. To focus the camera, the Mamiya uses bellows that bring the lens closer or farther from the film plane. The lens is a fixed piece of glass and does not focus internally. To adjust the bellows and focus your image, twist either of the large black knobs on the bottom front of the camera.
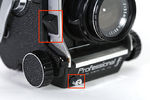
After your film has been advanced by turning the crank clockwise, the camera is ready to take a picture. There are two ways to release the shutter. The first is a silver button on the front of the camera in the bottom left corner. A cable release can also be screwed in here. The second way is with the slide mechanism on the right side of the camera. There is a small black lever for your thumb. Slide this downward to release the shutter. As the Mamiyas are quite old, not all of the cameras are able to be fired with either method. Some can only use one or the other and this will be indicated by a note on the camera. Advance the film after each exposure.
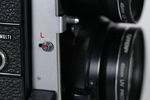
There is a shutter lock on the slide mechanism that can be pushed to the "L" position. This prevents both shutter releases from being able to move and is thus useful to use when transporting the camera or arranging your shot.
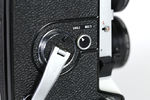
To take take a picture using multiple exposures, there is a dial next to the film advance crank that has the option of either "SINGLE" or "MULTI". Turn this to "MULTI" to be able to exposure a frame multiple times without needing to advance the film.
Unloading Film
After twelve frames are exposed, continue to turn the winding crank until there is no more tension on the advance crank. At this point, the protective paper of the film should be rolled up around the take up spool. When unloading the film, keep the spool rolled and hold the film tightly to prevent light exposure. Lick or peel the tab on the film and wrap it firmly around the exposed film. Close the camera back.
Using a Flash
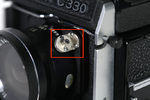
To synchronize a flash with the Mamiya, switch the Synchro Selector MX Switch to “X”. You will need to check out a Vivitar flash and a flash sync cable. Because the Vivitar flash was not designed to be used with the Mamiya, it will not properly mount on the hot shoe. Therefore, you’ll need to hold it while taking your picture. The Seagull and the Kalimar should not require a sync cable as they can mount onto the hot shoe. Caution: Avoid moving the self-timer while the flash sync is set at “M”. It may cause damage to the self-timer.

