File Management - Audition
From Help Wiki
Intro
- File management with any media project is the most important step in post production.
- Following these steps will save you and your project from unneeded stress and major file corruption.
In the Finder
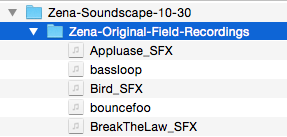
- Always make a project folder with your name, project description, and date within the name field

- Use safe file and folder naming practices: use text, numbers, and hyphens or underscores. Avoid all other special characters.
- Copy your folder that contains all your original field recordings into this project folder as well
In Audition
- Open Adobe Audition located in the dock - go to File > New > Multitrack Session
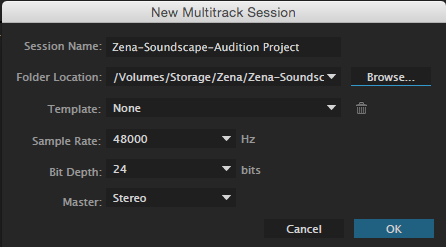
- In Audition go to File > Multitrack Session and set the following settings:
- Session Name: use a meaningful name.
- Folder Location: Click Browse and select your folder on you Desktop
- Template : None
- Sample Rate: 48000
- Bit Depth : 24
- Master: Stereo
- Click OK
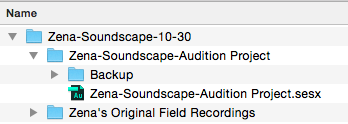
- Your finished project folder should look like this.
- All of your files are now contained in one folder and you can safely work, transfer, save and back up your project as long as it stays in one folder


