APS Bolex Filter Kit Quick Guide
Contents
[hide]INTRODUCTION
A filter kit is a useful tool for making real-time adjustments to your film exposure. The guide will cover the contents of the filter kits at APS as well as how and when to use each filter. There are a variety of filters that each have their own effect on the film for achieving things like color correcting, allowing wider apertures (with neutral density [ND] filters), converting daylight balanced film to a tungsten balance and vice versa, or adjusting contrast. Almost every filter has a specific purpose and can only be used in specific lighting situations.
Most filters require an adjustment to the lens' aperture to ensure a proper exposure. To do this set your exposure with your light meter as you normally would. Refer to the chart below or the list on the filter box and open the aperture the extra number of stops that corresponds to the filter in use. As the Bolex lens apertures move in 1/2-stop increments, it may be necessary to have the aperture sit in between two notches.
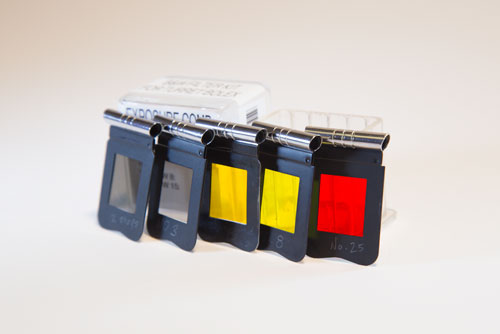
There are two kinds of Bolex filter kits at APS, those for black and white film and those for color film. Each type is available for use with both bayonet mounts and turret mounts. Keep in mind that bayonet filter holders can only be used with bayonet mount cameras, and likewise for turret mount cameras. The name of each filter is written on the metal filter carriers.
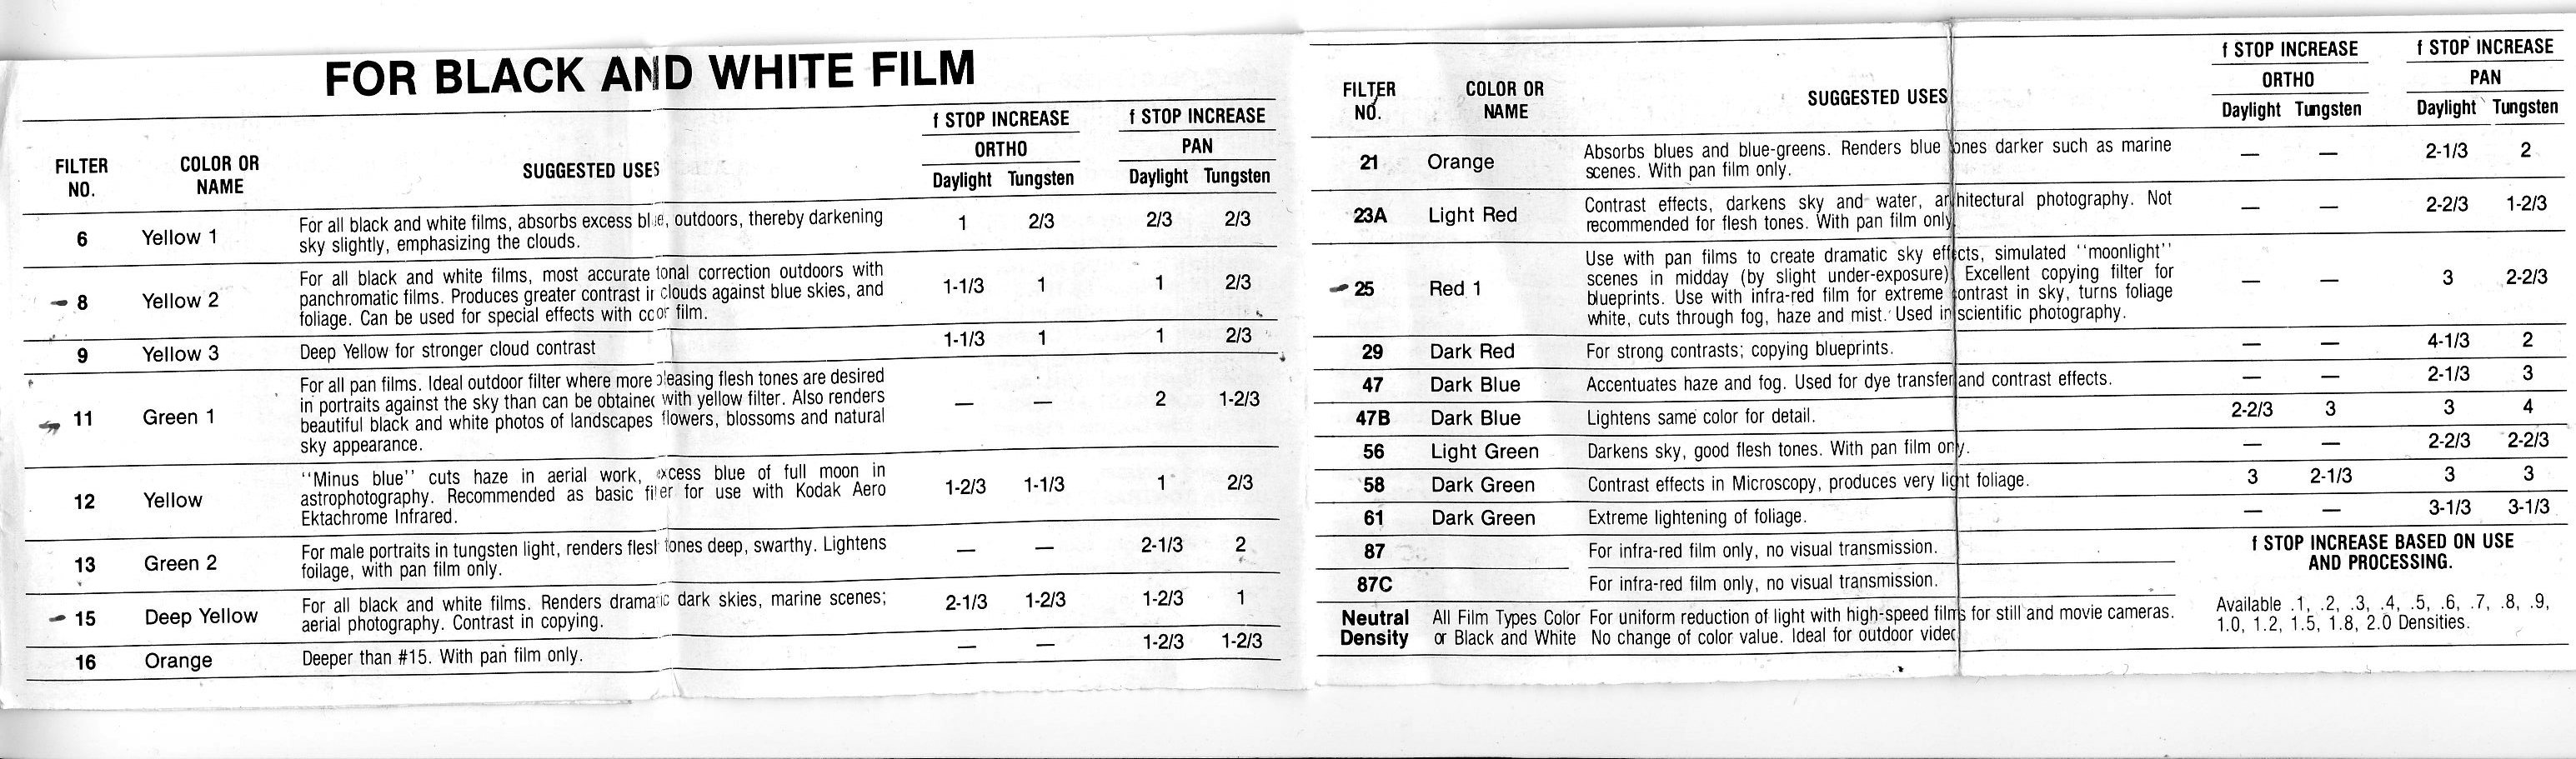
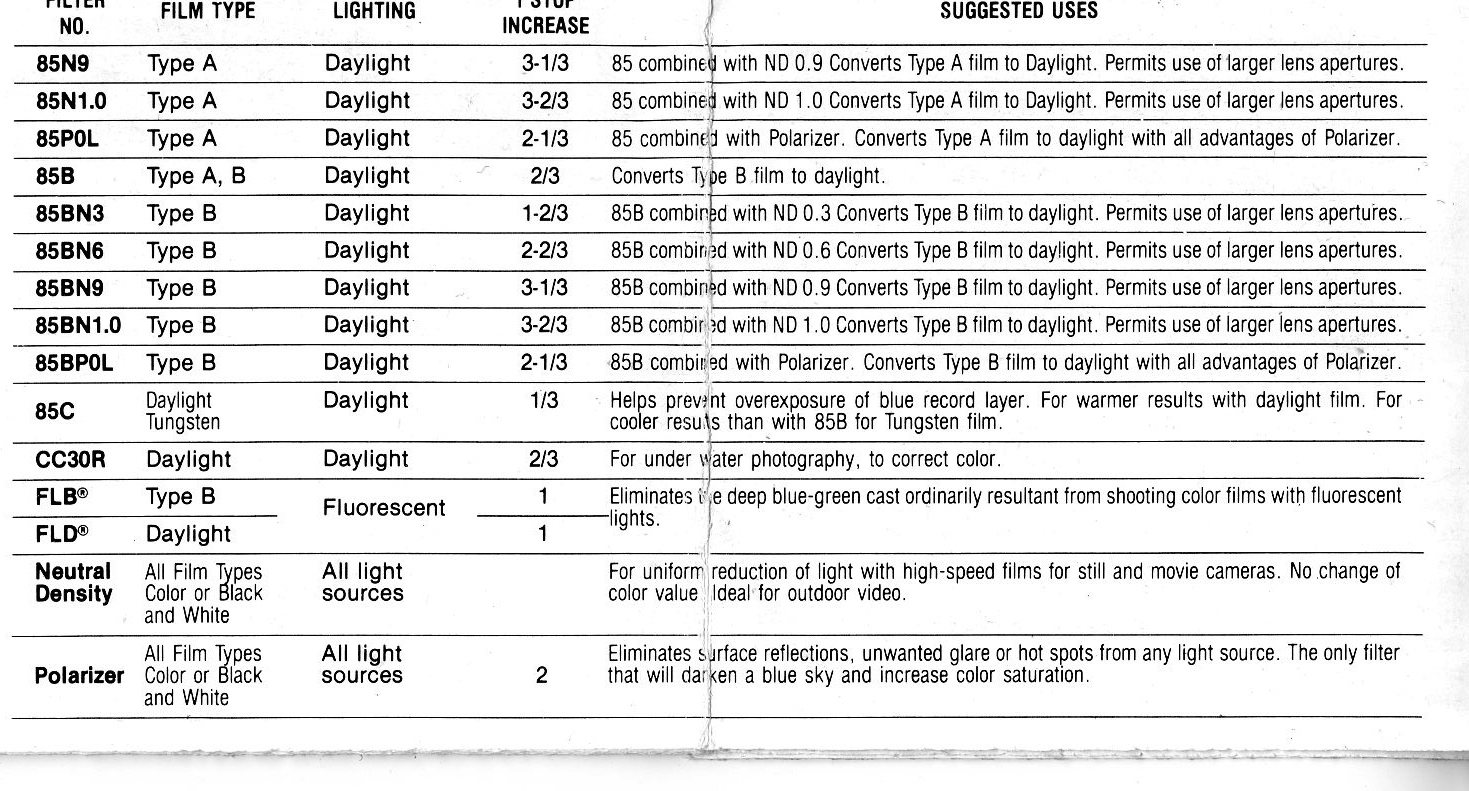
You may also look at the chart at the bottom for an idea of the range of filters made. While we do not stock all of these filters, the chart can be helpful to get a sense of the exposure compensation required and other requirements for each filter.
CHANGING FILTERS
Every Bolex comes with an empty removable filter carrier. Whether or not you plan on using filters, this carrier needs to be in the camera while filming to prevent light leaks. For more on basic Bolex operation, read here. To use a filter from the kit, remove the empty carrier from the camera. On cameras with turret mounts, the carriers look like those photographed above and simply slide out of the camera. On cameras with bayonet mounts, the filter carriers have a moveable handle that must be raised out of the camera before it can be removed.
CARE
The filters themselves are fragile. Since all of the light that your film will capture must first pass through the filter before an image is created on the film, having a clean filter is imperative for having a clean image.
Here are some quick points to help keep them in top shape:
- Do not ever touch the filter with your fingers, otherwise moisture and grease from your skin will transfer onto the filter
- Do no leave the filters in the car or any other place that can trap heat, get too hot, and warp the filters
- If there is debris on the filter, blow it away with a can of compressed air, or gently use a tissue. Don't blow on it.
- When not in use, put the filter back in the case (common sense). Keeping them in the order listed on the case is courteous and will result in bonus points for you.
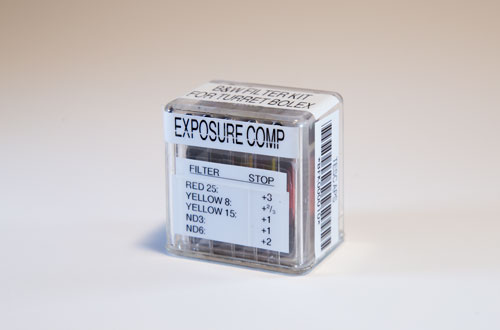
BLACK & WHITE KITS
| Filter Name | f-stop Increase | Use |
|---|---|---|
| Red 25 | +3 | Creates dramatic sky effects. Simulates moonlight in midday by slight under-exposure. |
| Yellow 8 | +⅔ | Tonal correction for outdoors. Makes greater contrast in foliage and in clouds against a blue sky. |
| Yellow 15 | +1 | Creates dramatic dark skies and marine scenes. |
| ND3 | +1 | Blocks light to allow wider aperture. |
| ND6 | +2 | Blocks light to allow wider aperture. |
COLOR KITS
| Filter Name | f-stop Increase | Use |
|---|---|---|
| Sky 1A | 0 | Use anytime outdoors to reduce blues and add warmth. |
| 80A | +2 | Converts daylight film for use with 3200°K lamps. |
| 85 | +⅔ | Converts tungsten balanced film to daylight balance. |
| 85N3 | +1 ⅔ | Filter 85 combined with a .3 neutral density filter. |
| 85N6 | +2 ⅔ | Filter 85 combined with a .6 neutral density filter. |
COMPREHENSIVE LIST