Audacity is developed by a team of volunteers and released under an open-source license and is the only audio editing software that is run on Mac's, PC's, and Linux computers. Go to http://audacity.sourceforge.net/ to download the most current version 1.3.13 Beta.
Open Audacity found in the applications folder.
Importing audio: Import > Audio navigate to the audio files that you want to import.
Save your project (preferrably after every edit) File > Save navigate to your hard drive and create a folder with your name and save it to that folder. This folder will contain all your audio files and edit information so you can continue to work on different computers so keep this folder and it's information contained.
Tools
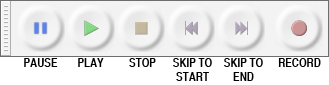
Transport Toolbar - controls playback and recording
Tools Toolbar - chooses various tools for selection, volume adjustment, zooming, time-shifting of audio and a multi-function tool

Meter Toolbar - displays levels for playback and recording
Mixer Toolbar - controls the mixer settings of the sound card
Transcription Toolbar - plays audio at a slower or faster speed, affecting the pitch
Edit Toolbar - cut, copy, paste, trim, silence, undo, redo, sync-lock, zoom
Tracks - Tracks > Add new > Audio track, Stereo track, Label track, or Time track
Mono track
Stereo track
Label track
Track Control Panel: allows you to rename the track, provides sample information, mute or solo the track, increase volume and pan left-right function.
Editing