Olympus LS-100 Audio Recorder Gear Guide
Contents
- 1 Overview
- 2 Kit Contents
- 3 How to Use It
- 4 Power
- 5 Recording
- 6 Troubleshooting
- 7 Media Loan Gear it Connects With Well
- 8 Other Models of Audio Recorder at Media Loan
- 9 Policy Sidebar
Overview
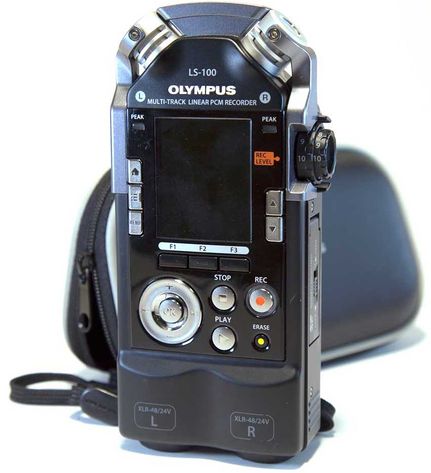
This is a basic guide for the LS-100 Audio Recorder. Additional information can be found in the operating manual by downloading it at the bottom of the link.
Kit Contents
- Audio Recorder
- Outer case and inner case
- Charger
- USB cable
- Windscreen
- 2 rechargeable batteries
How to Use It
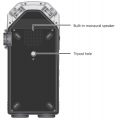
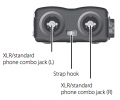
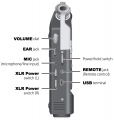
Name of Each Part
Power
Battery
USB and Power Settings
The USB Connection setting needs to be changed to either connect the recorder to a computer or to power the recorder from AC while recording.
There are 3 options:
- PC: allows the recorder to be connected to a computer. Can be used to charge the batteries.
- AC Adapter: allows the recorder to be in record mode while connected to AC. Can be used to charge the batteries.
- Optional: anytime the recorder is connected to a computer or the AC Adaptor it will display a menu to select PC or AC Adapter. Use this setting.
- Press the MENU button
- Forward through the tabs to the DEVICE MENU
- Press the - button down to select USB Settings and press OK.
- Select USB Connection and press OK.
- Select Optional and press OK.
Recording
Helpful Menu Options
Record 2 XLR inputs with manual record level:
These settings will enable the recorder to use both (2) XLR inputs with manual record level:
- Menu > Record Mode > Normal
- Menu > Mic Gain > XLR (L) > HI
- Menu > Mic Gain > XLR (R) > HI
- Menu > Rec Level > XLR (L) > Manual > Limit/Comp Off OR Limiter 1/2 if you want extra protection from clipping your recorded audio
- Menu > Rec Level > XLR (R) > Manual > Limit/Comp Off OR Limiter 1/2 if you want extra protection from clipping your recorded audio
- Menu > Input Select > XLR/Phone
- Menu > Rec Format > PCM > 48.0 Khz / 24 Bit
- Menu > Low Cut Filter > 100Hz
- Menu > Pre-Recording > Off
- Menu > Rec Monitor > On (this allows you to listen to audio in your headphones while recording)
These settings are good to take note of:
- Menu > Press the Right button ( >>| ) four times to get to the LCD/Sound Menu screen
- LCD/Sound Menu > Backlight > Lighting Time > Always on (this keeps your display from turning off)
- LCD/Sound Menu > Beep > Press the Down button ( - ) until the number reads as "00" (this mutes the beep sound when pressing buttons)
- LCD/Sound Menu > Voice Guide > On/Off > Off (If you do not want your device to talk to you every time you press a button, turn Voice Guide OFF)
- Menu > Press the Right button ( >>| ) five times to get to the Device Menu screen
- Device Menu > Time & Date > Use the Left/Right/Up/Down buttons to set Time & Date (this can be helpful when reviewing your unnamed files later)
- Device Menu > Format > Internal Memory > Start > Start (Formatting means all files will be deleted off of the device, so only do this when you first check out your recorder and after you have safely stored your own recorded files onto a computer and/or other devices)c
Connect Microphones
Connect to Computer
Playback
Playback the Recording
- Press the List button.
- Use the + and - buttons to select a file and press OK.
- The file name will be displayed in the window.
- Press the Play button.
Playback Speed
- While playing an audio file the speed can be changed from 50% to 400%.
- During playback the up and down arrow button on the front right of the recorder adjust the playback speed.
- Leave it set to 100%.
The Menu System
Press the MENU button on the left to open the menu. Use the directional pad to move through the options.
Record Menu
- Record Mode
- Normal - each microphone that is being used to record produces it's respective track.
- Overdub - The live microphone is mixed with the file that is being played back. The original file does not get erased.
- Play Sync - This allows you to playback a file and while only the live microphone is recorded.
- V-Sync Rec - a feature that automatically starts a recording when the recorder detects a sound louder than the voice sync level (detection level) setting; when the sound level decreases, recording stops automatically.
- Mic Gain this option let's you adjust the sensitivity of the selected mic
- Built-in Mic - Hi (preferable), Mid, Lo
- External Mic - Hi (preferable), Mid, Lo
- XLR L - Hi or Lo
- XLR R - Hi or Lo
- Record Level
- Manual - let's you adjust the recording manually. Preferred.
- Auto - the recording level is adjusted automatically.
- Press the REC button to enter the recording standby mode.
- Adjust the REC LEVEL dial according to the sound source.
- The REC LEVEL dial can separately adjust the level of the input source for the L/R channels.
- Input Select
- Built-in Mic - sound is input through the built-in stereo microphone.
- External Mic - sound is input by connecting an external microphone to the MIC jack.
- Line - sound is input by connecting an external unit to the MIC jack.
- XLR/Phone - sound is input through a musical instrument or the microphone connected to the XLR/standard phone combo jack.
- Mic Power
- Phantom power - +48V or 24V This setting sets the voltage of the phantom power. Set to +48V.
- Once you have selected your phantom power voltage, you may still need to flip the switch on the left side of the device to enable the power to flow our each XLR separately.
- Plug in power - ON/OFF This supplies power over the stereo-mini(3.5mm) mic input to certain mics.
- Phantom power - +48V or 24V This setting sets the voltage of the phantom power. Set to +48V.
- Rec Format
- PCM WAV 48.0kHz/24bit - Ideal selection for high quality sound files.
- MP3 - highly compressed and less desirable.
- Low Cut Filter
- This cuts low frequencies to reduce handling noise and unwanted bass-like sounds. Select the frequency you want the cut-off to start at.
- 100Hz
- 300Hz
- This cuts low frequencies to reduce handling noise and unwanted bass-like sounds. Select the frequency you want the cut-off to start at.
- Pre-Recording
- On/Off - This records 2 seconds prior to you pressing the record button
- Rec Monitor
- On/Off - This allows you to hear what you are recording while you are recording it through the headphone jack, labeled EAR on the left of the LS-100.
Play Menu
- Play Mode - one file or list
- Skip Space - Forward skip, Reverse skip
Erasing Files
Media devices use the word "format" to refer to erasing all files on an SD card or internal memory. Perform this function before every use to ensure maximum file space on the recorder/SD card and to erase all data before turning it back in to Media Loan.
- Press the MENU button
- Forward through the tabs to the DEVICE MENU
- Press the - button down to select FORMAT and press OK.
- Select Internal Memory or SD Card (You must provide your own card) and press OK.
- Select Start, and press OK.
Troubleshooting
See Troubleshooting Media Equipment Guide for general information.
Media Loan Gear it Connects With Well
See the Media Loan Catalog for more info about the below items.
- XLR cables (Mic Cables)
- Headphones
- Desk stands, floor stands, microphone handles (that can screw into the back of the Olympus)
- Microphones


