Difference between revisions of "Onionskin - Dragonframe"
Mediaintern5 (Talk | contribs) (→2D Animation (Hand-Drawn)) |
|||
| (94 intermediate revisions by 4 users not shown) | |||
| Line 1: | Line 1: | ||
| − | = | + | <h2 id="TOPSECTION">Intro</h2> |
| − | Onion skinning is a technique, accessible in the Dragonframe software, that enables animators to simultaneously see several of their most recent frames in Live View. Onion skinning is essential to accurately have fluid animation. | + | Onion skinning is a technique, accessible in the Dragonframe software, that enables animators to simultaneously see several of their most recent frames in Live View. Onion skinning is essential to accurately have fluid animation as it allows you to see your previous frames so that you can make a continuous movement when making new ones. |
== Settings == | == Settings == | ||
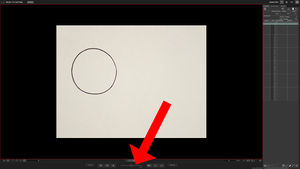
| − | + | When opening Dragonframe, you will find a tool called the '''Onion skin Opacity Slider,''' which is located underneath the Live-View (see Fig. 1.0 & Fig. 1.1). The Onion skin Opacity Slider lets you control the opacity of your previous animation frames. <br><br>[[File:Screenshot Marking 1.jpg|thumb|alt=(Fig. 1.0)|centre]]<center>(Fig. 1.0)</center> | |
| − | <br> | + | |
| − | <br> | + | |
| − | [[File:Screenshot Marking 1.jpg|thumb|alt=(Fig. 1.0)|centre]]<center>(Fig. 1.0)</center> | + | |
<hr> | <hr> | ||
| Line 12: | Line 9: | ||
<center> | <center> | ||
(Fig 1.1) | (Fig 1.1) | ||
| + | |||
| + | The red dot in the center of the Onion skin Opacity Slider (Fig. 1.1) is on Live-View. | ||
</center> | </center> | ||
<hr> | <hr> | ||
| − | [[File: | + | <div style="column-count:2;-moz-column-count:2;-webkit-column-count:2"> |
| + | [[File:OpacityRIGHT.gif|centre|thumb]] | ||
<center> | <center> | ||
(Fig. 1.2) | (Fig. 1.2) | ||
| + | [[File:OpacityLEFT.gif|centre|thumb]]</center> | ||
| + | <center> | ||
| + | (Fig. 1.4) | ||
</center> | </center> | ||
| − | + | </div> | |
| − | < | + | <div style="column-count:2;-moz-column-count:2;-webkit-column-count:2"> |
| + | [[File:SliderRIGHT.gif|centre|thumb]] | ||
| + | <center> | ||
| + | (Fig. 1.3) | ||
| + | </center> | ||
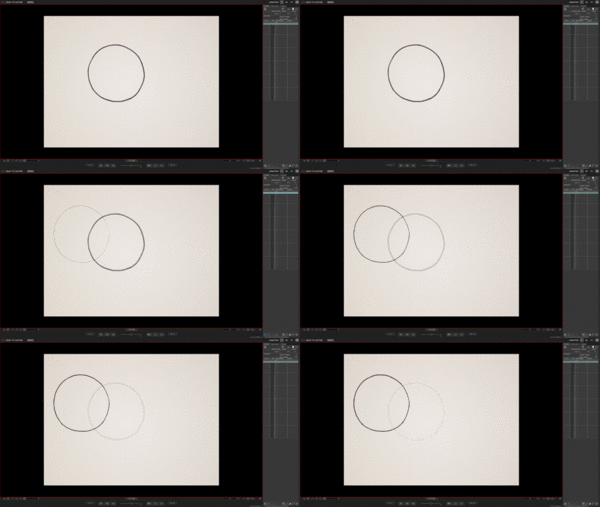
| + | <center>Moving the red dot to the right, lowers the opacity on the Live-View (Fig. 1.2).<center>The previous frame will appear when the red dot is moved to the far end (Fig. 1.3).</center> | ||
| + | [[File:SliderLEFT.gif|centre|thumb]] | ||
| + | <center> | ||
| + | (Fig. 1.5) | ||
| + | </center> | ||
| + | <center>Moving the red dot to the left, transitions the live view to the selected frame (Fig. 1.4). This happens if the first frame is selected on the X-Sheet (Fig. 1.5).</center> | ||
| + | </div> | ||
| + | <hr> | ||
== Onion Skin Modes == | == Onion Skin Modes == | ||
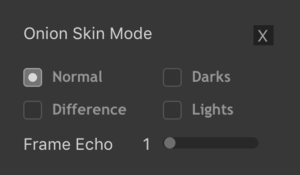
| − | + | At the bottom right of the Onion Skin Opacity Slider, there is an icon depicted in Figure 1.3 that, when clicked, opens up the '''Onion Skin Modes''' (Figure 1.4). | |
| + | |||
<br> | <br> | ||
<br> | <br> | ||
| Line 39: | Line 55: | ||
=== Onion Skin Modes: === | === Onion Skin Modes: === | ||
* <u>'''Normal'''</u> - The standard onion skinning mode. | * <u>'''Normal'''</u> - The standard onion skinning mode. | ||
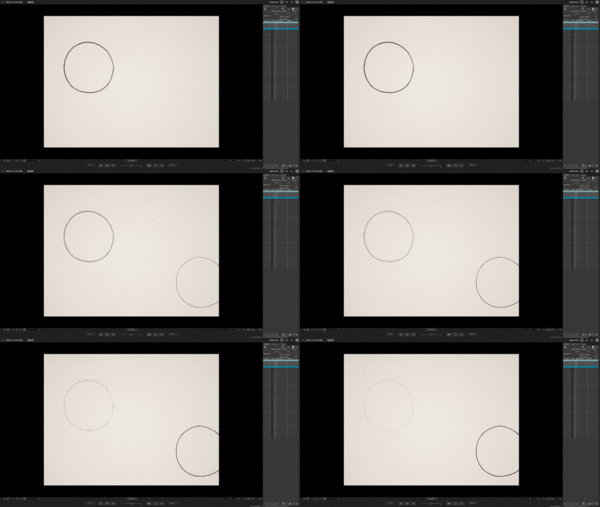
| − | * <u>'''Frame Echo'''</u> - Frame Echo allows you to see | + | * <u>'''Frame Echo'''</u> - Frame Echo allows you to see up to six of your most recent frames that you took through the Live-View by sliding the small grey circle (see Fig. 1.4) to the far right (see Fig. 1.5 & 1.6) |
| − | * <u>''' | + | *<u>'''Darks'''</u> - By activating Darks, the darker colors become more vibrant. |
| − | *<u>''' | + | *<u>'''Lights'''</u> - By activating Lights, the light colors become more vibrant. |
| − | *<u>''' | + | *<u>'''Difference'''</u> - If the frames are the same, the images become black. |
<br> | <br> | ||
<br> | <br> | ||
| Line 50: | Line 66: | ||
</center> | </center> | ||
<center> | <center> | ||
| − | As you can see | + | As you can see in Fig. 1.5, a series of frames are stacked on top of each other. |
</center> | </center> | ||
<center> | <center> | ||
| − | + | By activating the Frame Echo, we see that the darkest circle (bottom right) is our most recent frame while the rest of the stack lies behind in order. | |
</center> | </center> | ||
<hr> | <hr> | ||
| Line 67: | Line 83: | ||
== Onion Skin Examples == | == Onion Skin Examples == | ||
| − | === | + | === 2D Lab === |
| − | + | ==== 2D Animation (Hand-Drawn) ==== | |
| − | + | For 2D Animation, we will use a hand drawn circle to demonstrate how Onion skinning works. Be aware that if the lines are darker, then it's on the Live View when the onion skin is activated. | |
| − | + | ||
| − | + | ||
| − | + | ||
| − | |||
| − | |||
<br> | <br> | ||
<br> | <br> | ||
| + | <div style="column-count:2;-moz-column-count:2;-webkit-column-count:2"> | ||
[[File:2DAnimation(GIF).gif|centre|thumb]] | [[File:2DAnimation(GIF).gif|centre|thumb]] | ||
<center> | <center> | ||
(Fig. 2.0) | (Fig. 2.0) | ||
</center> | </center> | ||
| + | <center>(A GIF example of 2D Animation without onion skinning.)</center> | ||
| + | [[File:2DOnionskin (480x270).gif|centre|300x300px|thumb]] | ||
| + | <center> | ||
| + | (Fig. 2.1) | ||
| + | </center> | ||
| + | <center>(A GIF example of onion skinning with 2D Animation.)</center> | ||
| + | </div> | ||
<hr> | <hr> | ||
[[File:2DOnion1JPEG.jpg|centre|thumb]] | [[File:2DOnion1JPEG.jpg|centre|thumb]] | ||
<center> | <center> | ||
| − | (Fig. 2. | + | (Fig. 2.2) |
</center> | </center> | ||
<center> | <center> | ||
| − | 1.The first frame (Fig. 2. | + | 1. The first frame (Fig. 2.2), without the Onion skin, shown in the Live-View. |
</center> | </center> | ||
<hr> | <hr> | ||
[[File:2DOnion2JPEG.jpg|centre|thumb]] | [[File:2DOnion2JPEG.jpg|centre|thumb]] | ||
<center> | <center> | ||
| − | (Fig. 2. | + | (Fig. 2.3) |
</center> | </center> | ||
| − | <center>2.Right after taking the shot of the first frame, the opacity is lower. </center><center>The second frame (Fig. 2. | + | <center>2. Right after taking the shot of the first frame, the opacity is lower. </center><center>The second frame (Fig. 2.3), with thicker lines, has been drawn and ready to be taken as a shot through the Live-View,</center> <center>while the previous frame is pushed to the background.</center> |
| + | <hr> | ||
[[File:2DOnion3JPEG.jpg|centre|thumb]] | [[File:2DOnion3JPEG.jpg|centre|thumb]] | ||
<center> | <center> | ||
| − | (Fig. 2. | + | (Fig. 2.5) |
</center> | </center> | ||
| − | + | <center>3. Right after taking the frame shot of the second frame, the opacity is lower. </center><center>The third frame (Fig. 2.5), with thicker lines, has been drawn and ready to be taken as a shot through the Live-View.</center> | |
| + | <hr> | ||
[[File:2DOnion4JPEG.jpg|centre|thumb]] | [[File:2DOnion4JPEG.jpg|centre|thumb]] | ||
| − | + | <center> | |
| − | + | ||
| − | + | ||
| − | + | ||
| − | + | ||
| − | + | ||
(Fig. 2.6) | (Fig. 2.6) | ||
| + | </center> | ||
| + | <center>4. Right after taking the frame shot of the third frame, the opacity is lower.</center><center>The fourth frame (Fig. 2.6), with thicker lines, has been drawn and ready to be taken as a shot through the Live-View.</center> | ||
| + | <hr> | ||
| + | [[File:2DOnion5JPEG.jpg|centre|thumb]] | ||
| + | <center> | ||
| + | (Fig. 2.7) | ||
| + | </center> | ||
| + | <center>5. Right after taking the frame shot of the fourth frame, opacity is lower.</center><center>The fifth frame (Fig. 2.7), with thicker lines, has been drawn and is ready to be taken as a shot through the Live-View.</center> | ||
| + | <hr> | ||
| − | + | ==== Realigning The Stand ==== | |
| + | Another useful thing to note when using onion skinning is the ability to align your artwork in position within the frame when re-opening your Dragonframe folder. This is helpful to use if the Main Animation Desk or the height adjustment (that holds the camera) has been bumped or altered. | ||
| + | # To re-open your Dragonframe folder, open the Dragonframe software. | ||
| + | # Select '''Open Scene.''' | ||
| + | # Select your Dragonframe folder saved on the Desktop. | ||
| + | # Select '''Open Scene.''' | ||
| + | # Once Dragonframe is open, select your last frame and adjust the Onion Skin Opacity Slider. | ||
| + | # With the Onion Skin Opacity Slider, moved the red dot midway to the right. | ||
| + | # Place your animation drawing that you used for the frame and align your artwork in Live-View. | ||
| + | # Adjust the Main Animation desk if needed. | ||
| − | === 3D Animation === | + | === 3D Lab=== |
| − | + | ====3D Animation ==== | |
| − | + | By using this puppet, we will only be moving its arms as an example for using Onion skinning for 3D Animation. | |
| − | + | ||
| − | + | <br> | |
| − | + | <br> | |
| − | [[File: | + | <div style="column-count:2;-moz-column-count:2;-webkit-column-count:2"> |
| + | [[File:3DAnimation 480x270.gif|centre|thumb]] | ||
| + | <center> | ||
| + | (Fig. 3.0) | ||
| + | </center> | ||
| + | <center>(A GIF example of 3D Animation without onion skinning.)</center> | ||
| + | [[File:3DOnionskin480x270.gif|centre|thumb]] | ||
| + | <center> | ||
| + | (Fig. 3.1) | ||
| + | </center> | ||
| + | <center>(A GIF example of onion skinning with 3D Animation.)</center> | ||
| + | </div> | ||
| + | <hr> | ||
| + | [[File:3DOnion1 .jpg|centre|thumb]] | ||
| + | <center> | ||
(Fig. 3.2) | (Fig. 3.2) | ||
| − | + | </center> | |
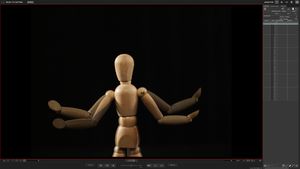
| − | [[File: | + | <center>1. The puppet repositioned to be taken as the first frame (Fig. 3.2).</center> |
| + | <hr> | ||
| + | [[File:3DOnion2 .jpg|centre|thumb]] | ||
| + | <center> | ||
(Fig. 3.3) | (Fig. 3.3) | ||
| − | + | </center> | |
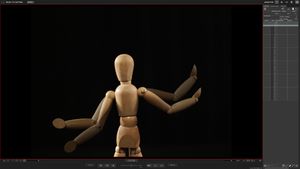
| − | [[File: | + | <center>2. After taking the shot of the first frame, the opacity of the arms are lower when moving the arms.</center><center> Right after repositioning the puppet (Fig.3.3), it is now ready to be taken as a second frame through the Live-View.</center> |
| + | <hr> | ||
| + | [[File:3DOnion3 .jpg|centre|thumb]] | ||
| + | <center> | ||
(Fig. 3.4) | (Fig. 3.4) | ||
| − | + | </center> | |
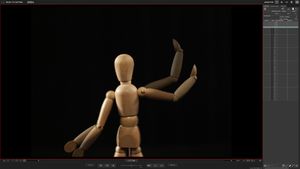
| − | [[File: | + | <center>3. After capturing the second frame, the arms repositioned and is ready to be shot as a third frame (Figure 3.4).</center> |
| + | <hr> | ||
| + | [[File:3DOnion4 .jpg|centre|thumb]] | ||
| + | <center> | ||
(Fig. 3.5) | (Fig. 3.5) | ||
| − | + | </center> | |
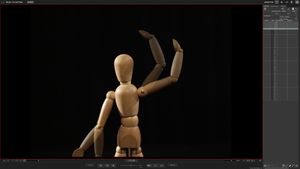
| − | [[File: | + | <center>4. The arms repositioned to be shot as a fourth frame (Fig 3.5).</center> |
| + | <hr> | ||
| + | [[File:3DOnion5 .jpg|centre|thumb]] | ||
| + | <center> | ||
(Fig. 3.6) | (Fig. 3.6) | ||
| − | + | </center> | |
| − | [[File: | + | <center>5. The arms repositioned to be shot for the fifth frame (Fig. 3.6).</center> |
| + | <hr> | ||
| + | [[File:3DOnion6 .jpg|centre|thumb]] | ||
| + | <center> | ||
(Fig. 3.7) | (Fig. 3.7) | ||
| − | + | </center> | |
| − | + | <center>6. The last and final shot of repositioning the puppet (Fig. 3.7).</center> | |
| − | + | <hr> | |
| − | + | ||
| + | [[#TOPSECTION |Go To The Top]] | ||
[[Category:Animation Labs]] | [[Category:Animation Labs]] | ||
[[Category:Dragonframe]] | [[Category:Dragonframe]] | ||
Latest revision as of 15:40, 1 December 2018
Contents
Intro
Onion skinning is a technique, accessible in the Dragonframe software, that enables animators to simultaneously see several of their most recent frames in Live View. Onion skinning is essential to accurately have fluid animation as it allows you to see your previous frames so that you can make a continuous movement when making new ones.
Settings
When opening Dragonframe, you will find a tool called the Onion skin Opacity Slider, which is located underneath the Live-View (see Fig. 1.0 & Fig. 1.1). The Onion skin Opacity Slider lets you control the opacity of your previous animation frames.(Fig 1.1)
The red dot in the center of the Onion skin Opacity Slider (Fig. 1.1) is on Live-View.
(Fig. 1.3)
(Fig. 1.5)
Onion Skin Modes
At the bottom right of the Onion Skin Opacity Slider, there is an icon depicted in Figure 1.3 that, when clicked, opens up the Onion Skin Modes (Figure 1.4).
(Fig. 1.3)
(Fig. 1.4)
Onion Skin Modes:
- Normal - The standard onion skinning mode.
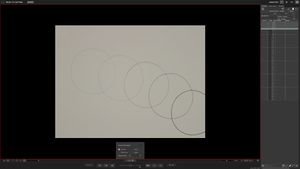
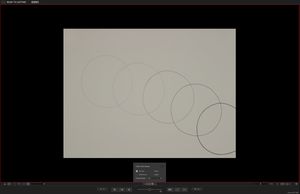
- Frame Echo - Frame Echo allows you to see up to six of your most recent frames that you took through the Live-View by sliding the small grey circle (see Fig. 1.4) to the far right (see Fig. 1.5 & 1.6)
- Darks - By activating Darks, the darker colors become more vibrant.
- Lights - By activating Lights, the light colors become more vibrant.
- Difference - If the frames are the same, the images become black.
(Fig 1.5)
As you can see in Fig. 1.5, a series of frames are stacked on top of each other.
By activating the Frame Echo, we see that the darkest circle (bottom right) is our most recent frame while the rest of the stack lies behind in order.
(Fig. 1.6)
(Frame Echo activated without the X-Sheet.)
Onion Skin Examples
2D Lab
2D Animation (Hand-Drawn)
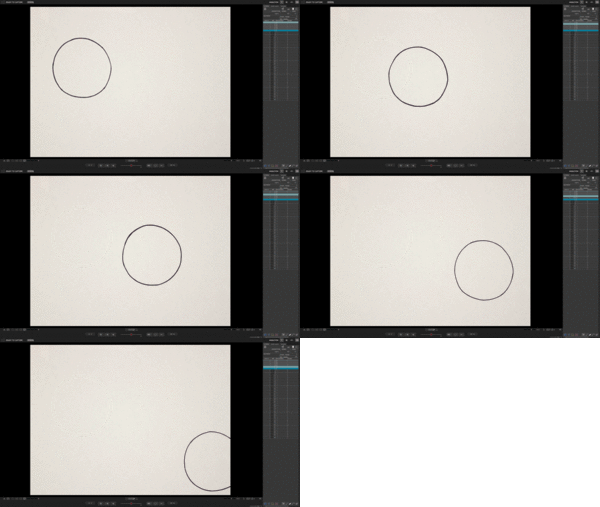
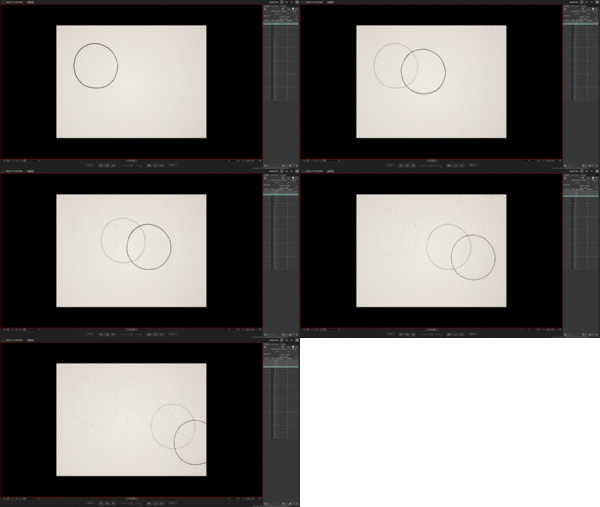
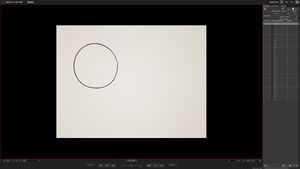
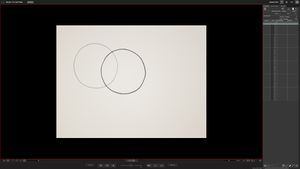
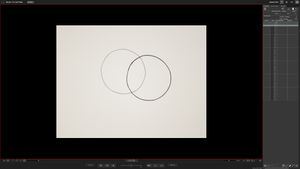
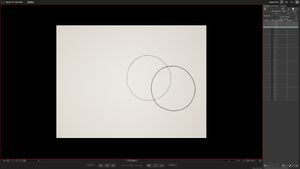
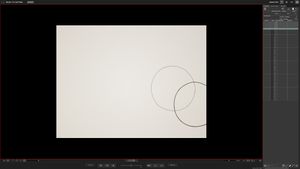
For 2D Animation, we will use a hand drawn circle to demonstrate how Onion skinning works. Be aware that if the lines are darker, then it's on the Live View when the onion skin is activated.
(Fig. 2.0)
(Fig. 2.1)
(Fig. 2.2)
1. The first frame (Fig. 2.2), without the Onion skin, shown in the Live-View.
(Fig. 2.3)
(Fig. 2.5)
(Fig. 2.6)
(Fig. 2.7)
Realigning The Stand
Another useful thing to note when using onion skinning is the ability to align your artwork in position within the frame when re-opening your Dragonframe folder. This is helpful to use if the Main Animation Desk or the height adjustment (that holds the camera) has been bumped or altered.
- To re-open your Dragonframe folder, open the Dragonframe software.
- Select Open Scene.
- Select your Dragonframe folder saved on the Desktop.
- Select Open Scene.
- Once Dragonframe is open, select your last frame and adjust the Onion Skin Opacity Slider.
- With the Onion Skin Opacity Slider, moved the red dot midway to the right.
- Place your animation drawing that you used for the frame and align your artwork in Live-View.
- Adjust the Main Animation desk if needed.
3D Lab
3D Animation
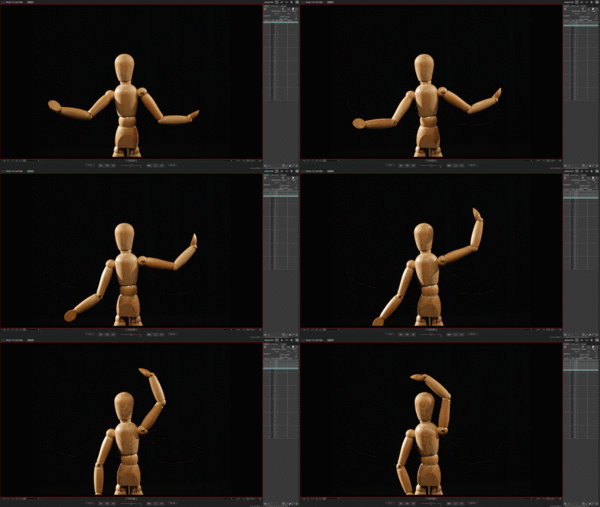
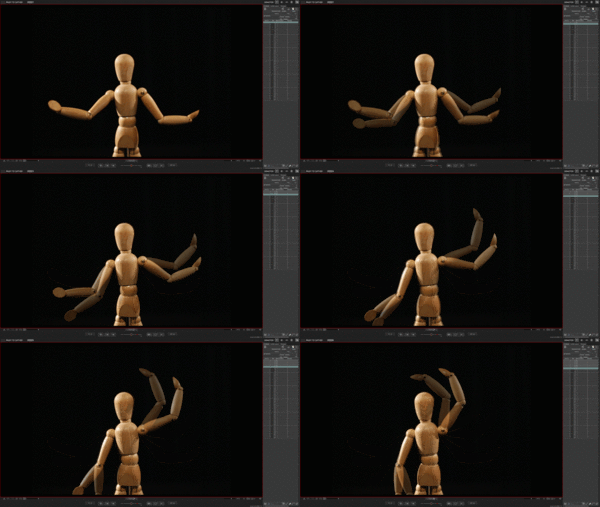
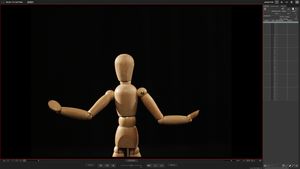
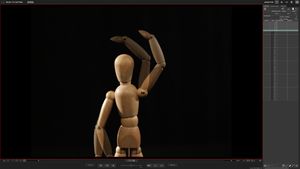
By using this puppet, we will only be moving its arms as an example for using Onion skinning for 3D Animation.
(Fig. 3.0)
(Fig. 3.1)
(Fig. 3.2)
(Fig. 3.3)
(Fig. 3.4)
(Fig. 3.5)
(Fig. 3.6)
(Fig. 3.7)

