Protected Files - WordPress
From Help Wiki

Protected Files
We're using the Media Vault plugin to add the ability to limit access to files uploaded to the Media Library. To add a protected file to your page or post:
- Upload your file via the Dashboard to your Media LIbrary: Media > Add New
- Go to your post/page and click the “Add Media” button to insert the link into your post or page
- Click the Media Library tab (as opposed to UPload File) choose your file
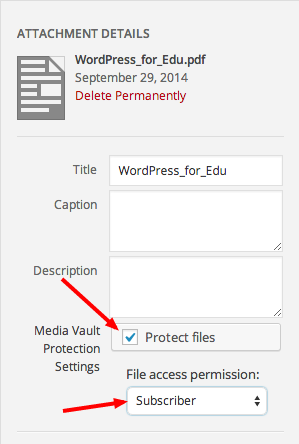
- Check the Protected Files checkbox
- Set the Protected Files access permissions to Subscriber. This will limit access to enrolled students in your course.
- Note: If you upload media via the “Add Media” button in your post you will need to go back to the Media Library and set the file protection to be viewable by Subscribers
Private Posts/Pages
- Set the post (or page) visibility to “private” in the “Publish” block
- On sites.evergreen.edu using the Subscribers Only plugin, we’ve set subscribers to have access to private posts/pages to allow you to create protected areas of an otherwise public site
- Consider setting a post or page to Private for any areas of the site where you would not want Google to index. For example, a page that lists links to copyrighted materials that would never be publicly available.