Difference between revisions of "Bronica 6x6 Camera Gear Guide"
m (Zornesn moved page Bronica 6x6 Camera Operating Guide to Bronica 6x6 Camera Gear Guide) |
|||
| Line 73: | Line 73: | ||
ETRSi: 4.5x6, prism finder, interchangable back, mirror lock up switch (same place as the SB-Q but not labeled). | ETRSi: 4.5x6, prism finder, interchangable back, mirror lock up switch (same place as the SB-Q but not labeled). | ||
| − | [[category: | + | [[category:APS Gear Guides]] |
Latest revision as of 11:33, 24 August 2023
A proficiency test is required to check out this camera. Schedule a proficiency at the front desk of Media Loan or by calling 360-867-6253. Read this operating guide and complete the written portion of the Bronica 6x6 Camera Proficiency Test prior to your scheduled proficiency. (You must already be proficient in the 35mm manual Camera and in Medium Format cameras before obtaining this proficiency.) Bring your answer sheet with you to the test, which should take approximately 30 - 45 minutes.
Contents
- 1 Precautions
- 2 Loading the Film
- 3 Film Advance and Shutter Cocking
- 4 Setting the Aperture and Shutter Speed
- 5 Distance and Depth of Field Scale
- 6 Viewing and Focusing
- 7 Shutter Release
- 8 Flash Photography
- 9 Film Unloading
- 10 Battery Check
- 11 Multiple Exposure
- 12 Mirror Lock-Up
- 13 Infrared Photography
- 14 Differences Between Models
Precautions
- PROTECT FROM EXTREME TEMPERATURE CHANGES
- PROTECT FROM IMPACT AND VIBRATIONS
- PROTECT FROM DIRT, SAND, WATER, VOLCANIC ASH ETC.
- ALWAYS PROTECT THE LENS WITH ITS LENS COVER
- DO NOT OVER TIGHTEN ANYTHING
- DO NOT USE SILICONE-COATED CLOTH ON THE LENS OR VIEWING SCREEN
- HAVE MEDIA LOAN CLEAN CAMERA IF LENS IS DIRTY, PLEASE RETURN THE CAMERA TO MEDIA LOAN IF YOU EXPERIENCE ANY PROBLEMS.
- If broken, DO NOT ATTEMPT TO FIX YOURSELF!
- You are 100% financially responsible for the equipment you check out from Media Loan.
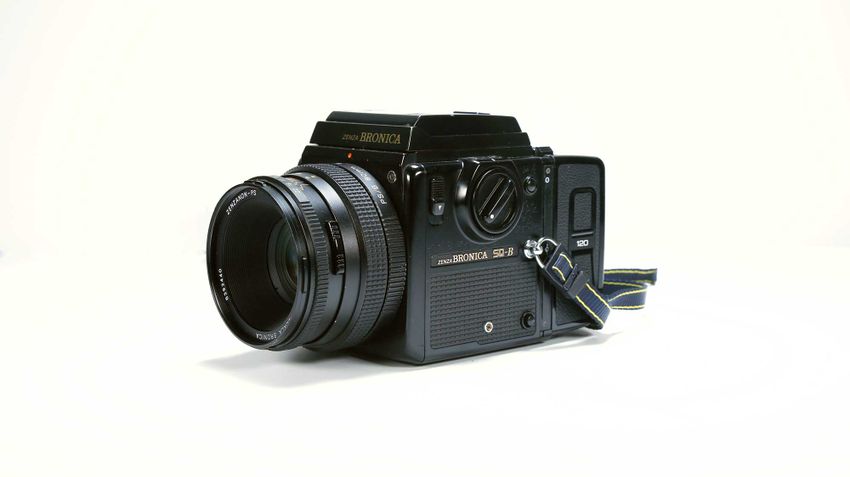
The Bronica does not have a built-in exposure meter so you will need to check out a light meter from Media Loan. READ ALL INSTRUCTIONS AND BECOME FAMILIAR WITH THE BRONICA BEFORE USE, THE SQ-B MODEL IS PICTURED.
Loading the Film
- Open the back—squeeze the film holder release buttons (#'s 13 and 14), located on top; right behind the viewfinder (#8), toward each other; the back will spring open and the film holder might fall out, be prepared! Remove the film holder.
- Gently push the top left side spool holder shaft (#27) out (a little trap door will fall open). Insert right end of film onto the right side shaft. Close the little trap door (the left side shaft) and the film spool should be engaged.
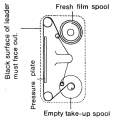
- Draw the leading end across the top roller (see diagram) and in front of the pressure plate, emulsion side out.
- Pull across the bottom roller and insert the leading end into the take up spool.
- Wind slightly with film back winding knob (#20) until securely engaged.
- Place film holder on back of camera, making sure it sits snugly.
- Wind film winding crank (#18) until starting point or arrow mark is lined up with red triangle on the left side of top spool holder.
- Close back until it latches securely.
- Don't Force It! If it will not easily close the film holder is not snug against the camera. Re-adjust it and try again.
- Wind film crank and release shutter until you see the “1” in the exposure counter (#15).
Film Advance and Shutter Cocking
Rotate the film winding crank (#18) forward (clockwise) one time; the film will advance one frame and the shutter will be cocked. You will feel resistance as the crank begins the wind; don’t panic, that’s the shutter being cocked.
Setting the Aperture and Shutter Speed
Use the aperture ring (#4) to set the F-stop. The shutter speed dial (#10) is located on the left side. You can view the speed setting by checking the shutter speed scale (#11).
Distance and Depth of Field Scale
Rotate the focus ring (#3) and line up the distance (the two rows of numbers circling the ring next to the focus ring) with the orange index line that reads 2.8. The depth of field scale (#5) is made up of identical pairs of numbers on either side of the index number. These pairs indicate the distance that will be in focus at these lens openings. The depth of field preview button (#23) is located on the left side of the lens. Media Loan does not have any other lenses or film backs for the Bronica so there is no need to use the lens release button (#24) or the film back release button (#31).
Viewing and Focusing
Open the focusing hood by pushing up on the catch (#9) at the rear of the folded finder. The magnifier (#12) is flipped into position by sliding the release (located inside the focusing hood on the right front) to the left, indicated by arrow. The lens is focused by rotating the focus ring (#3) in either direction, while checking the image in the split-image spot in the center of the focusing screen. A cable release can go into #28, the cable release socket.
Shutter Release
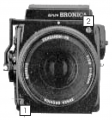
The release (#1) is located below the lens on the right. If the red dot is lined up with the red L, the shutter is locked; rotate counter clockwise to unlock. The red LED light will light up when you depress the release and the camera is loaded to indicate an exposure has been made. The LED will not light if: The shutter release is locked Film is not advanced or between “S” and “1” Shutter is not cocked Lens release button is depressed All frames have been exposed (i.e., 12 for 120) The shutter blades will close, under-exposing the film if the winding crank is accidentally rotated before the exposure is completed, as in the case of a slow shutter speed setting.
Flash Photography
Plug a flash cord into the flash plug (#2). Do not twist; straight in - straight out. The lens will automatically synchronize all shutter speed settings up to 1/500 of a second.
Film Unloading
After completely exposing one roll of film (12 exposures), continue winding until the leader paper is completely wound up, or approximately eight full turns of the advance crank. Then, open the back cover and take out the film holder. Remove the take-up spool from the film holder while holding the exposed film so that it will not unwind. Seal the exposed film.
Battery Check
A red LED is located inside the viewfinder. It lights up when the battery check button (#25), located on the left side behind the film speed dial, is pressed and when an exposure is made. Indicates battery is OK.
Multiple Exposure
To make multiple exposures, rotate the film winding crank (#18) to advance the film and cock the shutter. Rotate the multiple exposure lever (#17) clockwise, from 12 o’clock to 3 o’clock. It will lock in that position and the shutter can be cocked any number of times without the film advancing. Don’t forget to return the lever to its 12 o’clock position when your multiple exposure is finished.
Mirror Lock-Up
The mirror lock-up switch (#21) is located in front of the winding crank. It has 3 settings; N (normal—for shooting without locking up the mirror), S (single frame) or C (continuous—for shooting with the mirror locked up). Rotate the lock-up lever in a counter clockwise direction and line up N, S, or C with the dot. The lens shutter will close completely and the mirror will swing up.
Infrared Photography
The red line next to the orange distance index line on the lens barrel is the infrared index. After focusing in the normal manner, reset the distance to the red index line by shifting the distance ring. This will retain focus of the longer infrared rays.
Differences Between Models
There are three different models of the Bronica available at Media Loan: SB-Q, ETRS, and ETRSi. They are very similar exept for a few things. For example the lens release buttons are all in a slightly different place, they have different finders, and the exposures are different sizes.
SB-Q: 6X6, top view, waist level finder, no dark slides available (backs can not be changed) , mirror lock up switch.
ETRS: 4.5x6, prism finder, interchangable back, no mirror lock up switch.
ETRSi: 4.5x6, prism finder, interchangable back, mirror lock up switch (same place as the SB-Q but not labeled).


