Create New Site - First Time in WordPress
From Help Wiki
I'm new to blogs.evergreen.edu
Create a blogs.evergreen.edu account
- Navigate a web browser to the blogs.evergreen.edu login and login via the CAS login window.
- If you already have an account created at blogs.evergreen.edu this will login in directly to your dashboard.
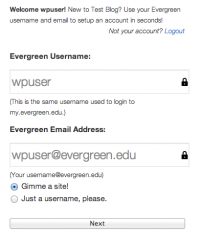
- If you're new you will be asked to create an account. Your Evergreen username and email are auto-filled
- Need account help? See: Evergreen Login Overview
- If you only want to create an account and do not need to set up a blog choose Just a username and click the Next button
Setting up a new blog
- If you also want to create a new blog site select Gimme a blog! and click Next
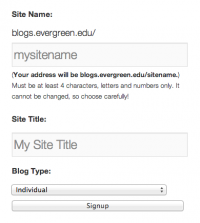
- Enter the Site Name - this will become part of your unique URL or web address and cannot be changed.
- Enter the Site Title - this will be used in the header section of your site and can be changed later
- From the drop-down menu choose the blog type: Program/Course, Individual, Group or Other.
- Click Signup. You should now be ready to login to your new blog.
Your site is not public, yet
When you first create a site it defaults to be viewable by logged-in users of blogs.evergreen.edu only. To make your site publicly viewable:
- From your Dashboard navigate to Settings > Readings
- Choose the Site Visibility setting that you want.
- Publicly viewable options include "Allow Search engines" or "Discourage search engines"
- The remainder are increasing levels of privacy
- Click Save Changes
Need More Help?
- WordPress Tutorial - for a step-by-step tutorial to get you started
- FAQs - common questions about using WordPress at Evergreen
- All WordPress articles
Still have questions or problems with WordPress, send Academic Computing a message or call the Computer Center at 360-867-6227.


