Difference between revisions of "Camera Fundamentals"
(Tag: VisualEditor) |
(Tag: VisualEditor) |
||
| Line 76: | Line 76: | ||
:The controls are often described as the Exposure Triangle. It is only called this because there are 3 components and it makes it easier to remember, there is no other significants or deeper meaning to the fact that it is a triangle. | :The controls are often described as the Exposure Triangle. It is only called this because there are 3 components and it makes it easier to remember, there is no other significants or deeper meaning to the fact that it is a triangle. | ||
:Setting the correct exposure for your photo can enable you to control if your image has noise from the ISO, depth of field from aperture and motion blur from shutter speed. For analog there is little automatic function, so you will need to manually choose all of your settings. For most digital cameras, they have a dial on the top right that you use to choose from Modes like M, Av, Tv, Auto, Video, etc. This is called the mode dial and can be used to choose if it's in full automatic, aperture priority where you choose aperture and it chooses the other exposure settings. For more on this, look at the mode dial section of the Canon Rebels Operating Guide. | :Setting the correct exposure for your photo can enable you to control if your image has noise from the ISO, depth of field from aperture and motion blur from shutter speed. For analog there is little automatic function, so you will need to manually choose all of your settings. For most digital cameras, they have a dial on the top right that you use to choose from Modes like M, Av, Tv, Auto, Video, etc. This is called the mode dial and can be used to choose if it's in full automatic, aperture priority where you choose aperture and it chooses the other exposure settings. For more on this, look at the mode dial section of the Canon Rebels Operating Guide. | ||
| − | :To play with a simulation of exposure controls, check out an [http://www.andersenimages.com/tutorials/exposure-simulator/ Exposure Simulator by Anderson Images] or an [ | + | :To play with a simulation of exposure controls, check out an [http://www.andersenimages.com/tutorials/exposure-simulator/ Exposure Simulator by Anderson Images] or an [https://canon.ca/CanonOutsideOfAuto/play Exposure Simulator by Canon.] |
{| class="wikitable" | {| class="wikitable" | ||
Latest revision as of 13:57, 14 February 2024
Page Overview: This page covers the basic topics for getting started with cameras. The information covered will provide the foundation for taking good pictures and videos. The controls and buttons of a camera can be daunting, but this guide will point out the key features to get started with your project. For beginners as well as advanced users, Media Loan's top camera recommendation is the Canon Rebel. See Media Loans Policies for more information on how to checkout gear and other resources. See Photoland's website for film development, digital editing and other photo resources. See the Multimedia lab page for information on how to use their computers for video editing as well as many other kinds of media software.
Exposure
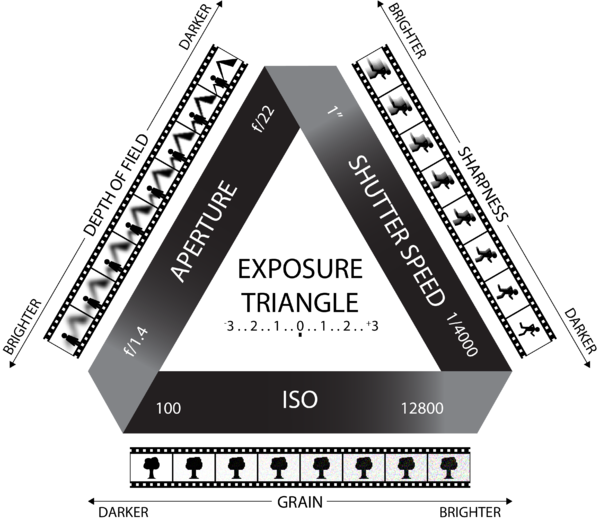
- Exposure results in an overall brighter or darker image. If an image is overexposed it will be blown out and look too white, on the other hand, an underexposed image is too dark. Getting the correct exposure is a balancing act between three controls. These three controls each affect the brightness of the image, but also have a side-effect that can be used to for artistic purposes.
- These controls are called ISO, aperture, and shutter speed. Photos can look wildly different based on how you adjust these controls. Most phone cameras automatically adjust these controls to result in a well exposed image but you loose the ability to get exactly the kind of image you want. Most digital cameras have the ability to automatically adjust these exposure controls too. However, understanding and adjusting these controls can allow you to take the exact pictures you want, like taking pictures in low light, or having everything is focus, or having no motion blur.
ISO
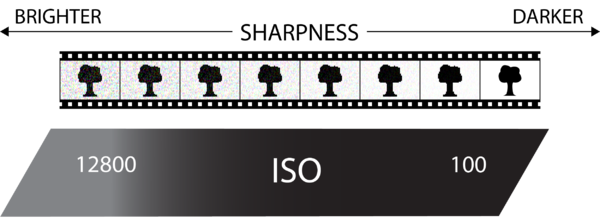
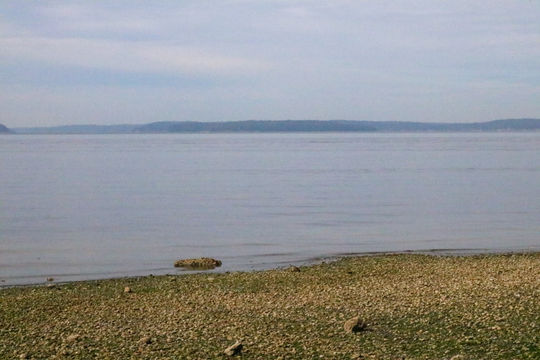
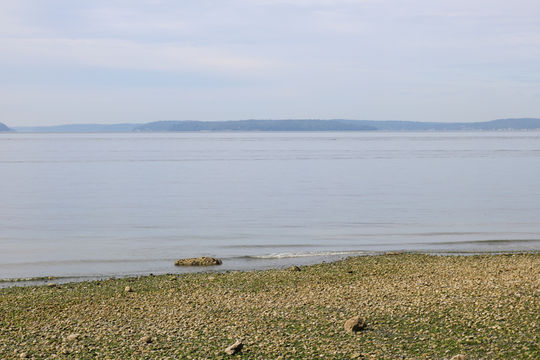
- Simply put, ISO is the sensitivity of the material that produces the image. For digital cameras, it is a fancy digital sensor, and film cameras use sensitive film strips. It seems odd, but both film and digital cameras describe their sensitivity as ISO. The ISO can be 100, 200, 400, 800, 1600, 3200 etc, with higher ISO being more sensitive and resulting in a brighter, more exposed image. Increasing the ISO has a drawback, it adds visual noise. For film, this is called grain and for digital it is seen as little errors in the pixels where the colors are adding randomness. For this reason you usually want to prioritize using lower ISO. You typically only increase ISO if you don't have enough exposure from the other controls. The pictures of the beach below use different ISO's. Click on them to compare the pixel noise added with the ISO of 12800.
- click to view different ISO pixel noise.
Aperture
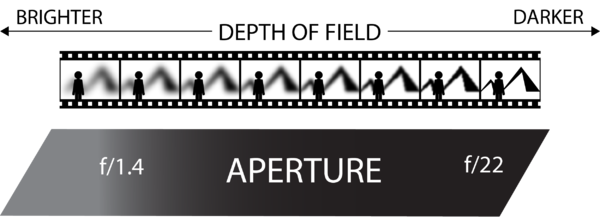
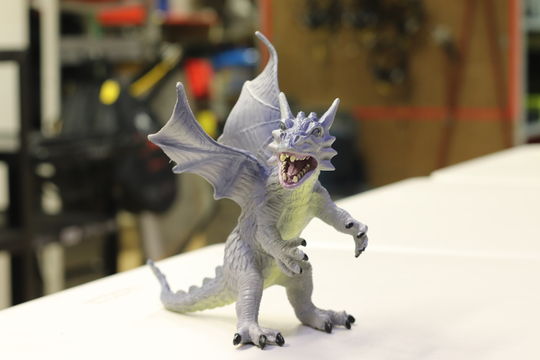
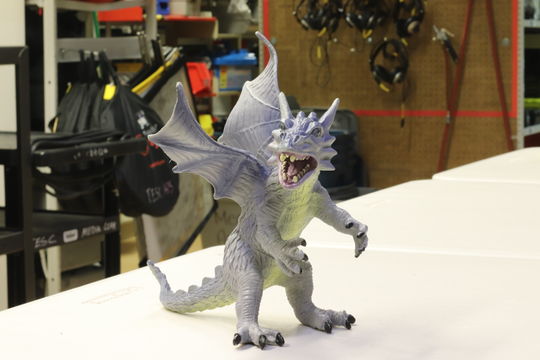
- Aperture is a hole in the lens that controls how much light is let through. Aperture is the hole and the mechanism that widens and narrows that hole is called the iris. Our eyes also have an iris that automatically changes our eyes' aperture, AKA pupil, in response to how much light we see. It is intuitive that a larger hole lets in more light, increasing the exposure and resulting in a brighter image. The aperture is measured in F-stops written like this; f/1.4, f/2, f/2.8, f/4 etc. The lower numbers can be described as more opened or large aperture, whereas a higher number can be described as more closed or small aperture. We need to talk about focus in order to understand what aperture does. The focus of an image is a plane parallel to the lens where the image will show up as the clearest, you usually want this to be on the most important part of the image like someone's face. What is out of the focus is seen as blurry. The focus can be moved forward and backward, but more on that in the Lens section below. For now, let's think about how the focus has a width, this is called the “depth of field." A wider depth of field allows more parts of the image to be clearer if they are within the focus. The depth of field is controlled by the aperture. Interestingly, the smaller the hole (higher number) is actually a wider depth of field. On the other end, a bigger hole (lower number) is a narrow depth of field. With the images of the dragon below; you may want just your picture of the dragon to have the dragon in focus only and the background blurry so you would want a higher aperture. This also then means that your photo is getting less exposure, so you would need to adjust your other controls like ISO might need to be brought up to increase your overall exposure.
- click to view different depths of field.
Shutter Speed
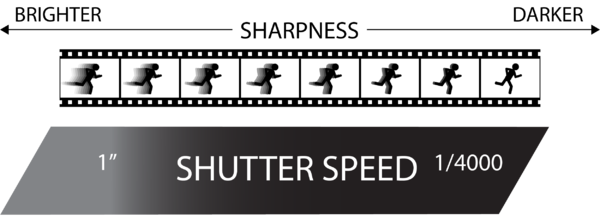
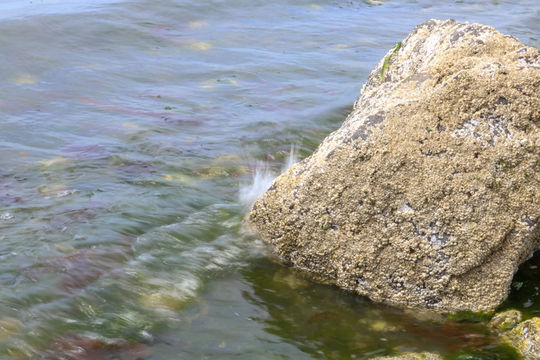
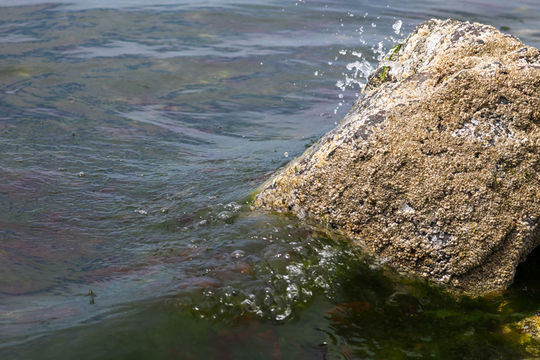
- The last control we have over the exposure is the shutter speed. The shutter is a door that quickly opens and closes to let light in so the digital sensor or film can be exposed. The time that the shutter is open is the shutter speed. It is measured in units like 1/60 seconds, 1/125 seconds, 1/250 seconds, 1/500 seconds. A slower shutter speed would allow more light in, increasing the exposure, but not capturing movement clearly. While the shutter is open, any movement in the scene going into the camera would be captured as a blur called motion blur. This can often be seen by a moving trailing image behind the subject like the above example of a stick figure. While quicker shutter speeds would just capture a snapshot still of the movement rather than blurring of that movement. If you wanted to take a picture of the movement of water, you would need to decide if you want the image to be a sharp representation of a moment, or a blurry representation of what happened over time.
- click to view motion blur effects of shutter speed.
Using the Exposure Triangle
- The controls are often described as the Exposure Triangle. It is only called this because there are 3 components and it makes it easier to remember, there is no other significants or deeper meaning to the fact that it is a triangle.
- Setting the correct exposure for your photo can enable you to control if your image has noise from the ISO, depth of field from aperture and motion blur from shutter speed. For analog there is little automatic function, so you will need to manually choose all of your settings. For most digital cameras, they have a dial on the top right that you use to choose from Modes like M, Av, Tv, Auto, Video, etc. This is called the mode dial and can be used to choose if it's in full automatic, aperture priority where you choose aperture and it chooses the other exposure settings. For more on this, look at the mode dial section of the Canon Rebels Operating Guide.
- To play with a simulation of exposure controls, check out an Exposure Simulator by Anderson Images or an Exposure Simulator by Canon.
| Exposure Element | Other/Related Names | Exposure Method | Effect | Example | Higher number means... |
|---|---|---|---|---|---|
| ISO | Film Speed | Sensitivity of digital sensor or film | Grain for Analog, Pixel Noise for Digital | 400 | More exposure and more noise |
| Aperture | Iris, Lens Speed, f-stop | Size of opening | Depth of field | f/2.8 is an f-stop of 2.8 and usally show as just 2.8 | Less exposure and less depth of field |
| Shutter Speed | Shutter | Time of exposure | Motion Blur | 1/250 of a second is usually shown as just 250 | Less exposure and less motion blur |
Lens
- Lenses are used to control focus and focal length. These will allow you to choose what part of the image is sharp and in focus as well as how much of the scene is captured in the image. Some cameras have detachable lenses, so you can mount different kinds to them. The Canon Rebel is great because Media Loan has many lenses to choose from. 35mm film cameras also have lenses to choose from.
Focus
Focus is what part of the scene is sharp, while the areas in front of and behind the focus plane will be out of focus and blurry. When we talked about Depth of Field with the Aperture in the Exposures section above, we are simply talking about the width of the focus. So, you can think of changing the depth of field as changing how wide the focus is. Lenses can change where the focus is by adjusting the focus ring, but different lenses will be able to focus at shorter distances therefor having close objects in focus. Some lenses called Macro Lenses are designed for these close focusing distances.
Focal length
- Focal lengths is an important quality of a lens. It directly affect “angle of view”, which is the angle produced by the lens. This angle is dependent on the focal length. The shorter the focal length, the wider the angle of view, which make the image see more of the scene, but less detail in each part of the scene. The longer the focal length the narrower the angle of view, which see less of the scene, but more detail in a smaller part of the scene. Technically, focal length is the distance from the lens to the sensitive material. This is measured in millimeters and lenses are often defined by their focal length like 50mm or 100mm. Lenses can also be categorized by their focal length like fish-eye, wide-angle, normal-angle, and telephoto. Fish eye is a very wide angle of view because it has a short focal length, and a telephoto is a very narrow angle of view because of its long focal length.
| Fish-eye | Wide-Angle | Standard | Telephoto |
|---|---|---|---|
| <24mm | <35mm | 35mm to 70mm | >70mm |
Zoom Vs Prime Lens
Some lenses can change focal length, while others cannot.
Zoom Lens: can zoom in on distant objects and zoom out to see the full scene because they have variable focal lengths. Zoom lenses are often described by their range of focal lengths like a 50mm-250mm lens or a 28mm-55mm lens.
Prime lens: on the other hand, cannot zoom in or out, so they only have one angle of view, because they have fixed focal lengths that can't change how much of the scene you see. Prime Lenses are often described by the one and only focal length they can use like 100mm lens or 35mm lens for example.
Photography
- There are a number of different concepts and equipment that only apply to photography and not video.
- Digital Cameras have many automatic features available like automatic exposure, focus, and white balance.
- Possibilities: You can make portraits, macro photos, landscape, stop motion, panorama, long exposure, multiple exposure, and many other types of projects. Digital cameras have different modes to choose from that may help you use different techniques or inspire new ideas.
- Film Development: The main different categories of film cameras are based on the size of film it uses. The smallest is 35mm, while the others are simply called medium format (uses 120mm film) and large format (4x5in film). 35mm in this case refers to the film size and not the focal length. The medium and large format use bigger film sizes, so that images can have incredible resolution. This detail means that the image can be scaled up for large prints. Although these cameras are older technology, they are still used by professional photographers today. For some cameras, you will need to use a light meter to help set the correct exposure, so check out this light meter guide. Media Loan offers all of these types of cameras, but the best to start with is a 35mm called the K1000. A proficiency test is required to use this camera, all info is in this 35mm operating guide.
- Editing: You can edit using Adobe Lightroom or Adobe Photoshop. You can scan film negative and images in the Digital Imaging Studio (DIS). With digital cameras, you can put your photos on the computer using a usb cable that comes with camera kits.
Video
- Video is just a camera taking pictures at a quick speed and played back in the same order. The same exposure and lens qualities still apply to recording video. Because of the dynamic nature of shooting video, you may want to rely on some of the automatic features of digital cameras. There are tons of options when it comes to video making.
- Mode: Digital Cameras have many automatic features available like automatic exposure, focus, and white balance. There are many kinds of Digital Cameras. The most common are the DSLRs like the Canon Rebel, camcorders like the Canon Vixia, and action cameras like the GoPro.
- Stabilizer: You can go handheld, or put it on a stabilizer, like a video tripod, Gorillapod (for lower shots), monopod (for light weight productions) or a unique rolling mount called the pocket skater.
- Audio: Most digital cameras have microphones built in, but it usually sounds better to use external mics and an audio field recorder like the H4n. For more information on audio check out the the Audio fundamentals page.
- Editing: Once you have gathered all your shots, you will likely want to edit your video using Adobe Premier Pro in the Multimedia Lab (MML). Video files live on SD cards inside the camera. You can put them on the computer using a usb cable that comes with camera kits, or removing the SD and using a card reader, just remember to put it back.
Lighting
- Media Loan also has lighting equipment.


