Create New Site - First Time in WordPress
From Help Wiki
Create a new account and site for users new to blogs.evergreen.edu
I'm new to blogs.evergreen.edu
blogs.evergreen.edu is Evergreen's WordPress instance primarily for community members looking to self-create a wordpress site/blog/academic journal. To create your own site, all you need is an evergreen email address and login. Faculty looking to create a curricular site using WordPress should use sites.evergreen.edu.
Create a blogs.evergreen.edu account and a new blog
- Navigate a web browser to the blogs.evergreen.edu login and login via the CAS login window.
- If you already have an account Click login/signup then you should be automatically redirected to the dashboard.
- If you're new you will be asked to create an account. Your Evergreen username and email are auto-filled
- Need account help? See: Evergreen Login Overview
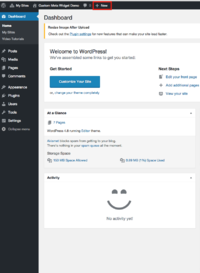
- To create a new blog site select the + New drop down menu and select Page OR select My Sites from the sidebar and select Add New
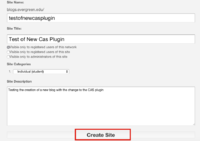
- Enter the Site Name - this will become part of your unique URL or web address and cannot be changed.
- Enter the Site Title - this will be used in the header section of your site and can be changed later
- From the drop-down menu choose the blog type: Program/Course, Individual, Group or Other.
- Click Signup. You should now be ready to login to your new blog.
Your site is not public, yet
When you first create a site it defaults to be viewable by logged-in users of blogs.evergreen.edu only. To make your site publicly viewable: Change your privacy settings.


