Image Settings - WordPress
From Help Wiki
Getting the proper image settings and details is an important part of working with graphics in your website. It's a good practice to prepare your images prior to uploading, such as cropping and reducing size, though an image that's been saved to your site can be edited through WordPress as well. This article also includes tips for iPhone and Mac Users around HEIC files.
Edit image details
You can customize image details even after it's been embedded in a page.
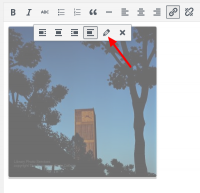
- From the page post edit screen, select the image.
- An edit image toolbar appears where you can adjust image alignment
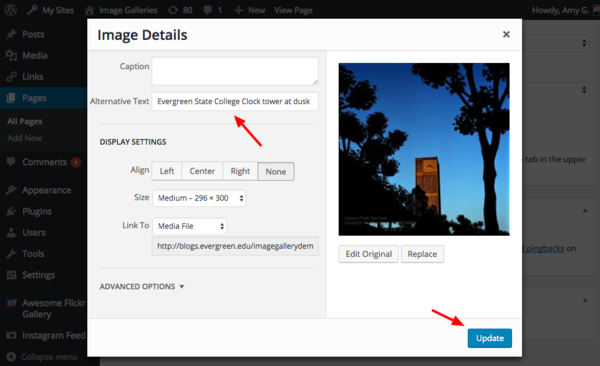
- Edit further by clicking the pencil icon. This will bring up the dialog box you saw when you first uploaded the image.
- From here you can
- Realign
- Resize
- add Alternative text - Important for accessibility
- and add a caption
- Click Update to apply
Image File Tips for iPhone & Mac Users
Change HEIC to JPG
- To make sure your iPhone isn't saving your photos as HEIC files instead of PNG or JPG, go to "Settings" > "Camera" > "Formats" > and select "Most Compatible."
- If you want to change the file type on your computer: open the photo, go to "File" in the top left, then scroll to the bottom of the drop-down menu to "Export" and change the format.
To disable the "live" image feature in iPhone Camera app
- when in the camera app, click on the "live" icon to turn it off
- or you can turn it off via your phone's Settings and Camera setting


