Difference between revisions of "Image Settings - WordPress"
From Help Wiki
m |
m |
||
| Line 6: | Line 6: | ||
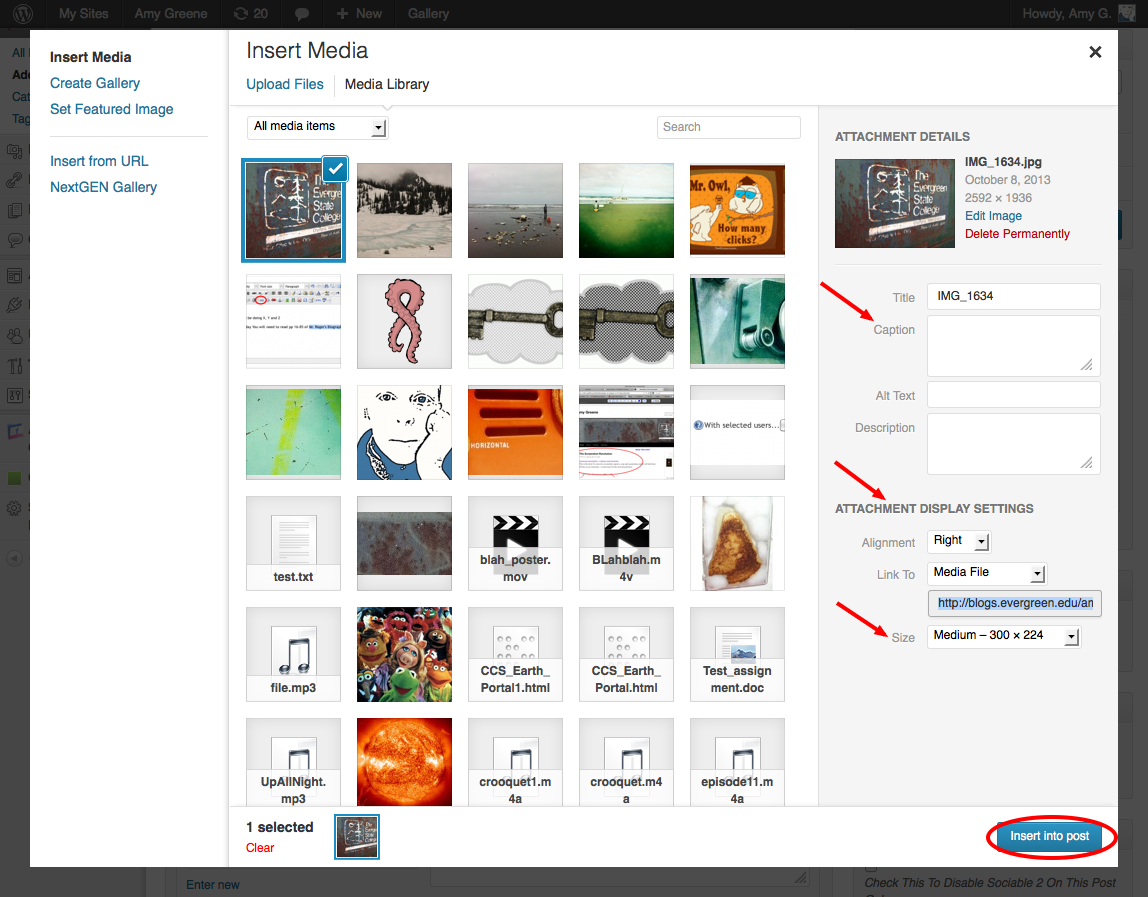
# Clicking on the image once in your page or post then click the edit image icon. This will bring up the dialog box you saw when you first uploaded the image (figure 3). | # Clicking on the image once in your page or post then click the edit image icon. This will bring up the dialog box you saw when you first uploaded the image (figure 3). | ||
# From here you can realign, resize and add a caption. | # From here you can realign, resize and add a caption. | ||
| + | |||
| + | |||
| + | |||
[[Image:Imagedetails.png]] | [[Image:Imagedetails.png]] | ||
Revision as of 15:40, 12 October 2016
Image Settings
Edit image properties afterwards
You can customize how the image looks once you upload it.
- Clicking on the image once in your page or post then click the edit image icon. This will bring up the dialog box you saw when you first uploaded the image (figure 3).
- From here you can realign, resize and add a caption.
WordPress Tutorial
Adding Images and Media
- Upload and insert an image into a post or page
- Image details - size, align, alt text, caption
- Image galleries
- Embed Media from external sites (YouTube, Vimeo, Flickr, SoundCloud, etc.)
- Upload a short MP3 audio file and embed with a player
- About file storage space
Designing Your Site
- Choose a theme
- Make additional changes to your theme
- Widgets
- Add external links
- Change what your front page displays
- Navigation Menus
Still have WordPress questions?
- Create a Help Ticket or call the Computer Center at 360-867-6227
- WordPress FAQ - common questions
- WordPress Tutorial - step by step introduction
Still have WordPress questions?
- Create a Help Ticket or call the Computer Center at 360-867-6227
- WordPress FAQ - common questions
- WordPress Tutorial - step by step introduction


