Difference between revisions of "Images in Wordpress"
From Help Wiki
m |
|||
| Line 1: | Line 1: | ||
{{TwoColumn|lead= | {{TwoColumn|lead= | ||
| − | Learn to insert images into your Posts or | + | Learn to insert images into your Posts or Pages. |
|content= | |content= | ||
[[Image:imagemenu.png|thumb|250px|right|Figure 1]] | [[Image:imagemenu.png|thumb|250px|right|Figure 1]] | ||
| Line 8: | Line 8: | ||
===Storing Images in your WordPress Media Library=== | ===Storing Images in your WordPress Media Library=== | ||
| − | ==== Uploading Images To | + | ==== Uploading Images To WordPress ==== |
#While editing your post or page, place the cursor in the page where you'd like the image inserted. | #While editing your post or page, place the cursor in the page where you'd like the image inserted. | ||
#Click on the '''Add Media''' button (figure 1) and select an image from your computer (Select Files) | #Click on the '''Add Media''' button (figure 1) and select an image from your computer (Select Files) | ||
Revision as of 15:13, 2 February 2017
Learn to insert images into your Posts or Pages.
Storing Images in your WordPress Media Library
Uploading Images To WordPress
- While editing your post or page, place the cursor in the page where you'd like the image inserted.
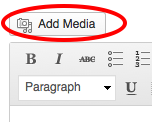
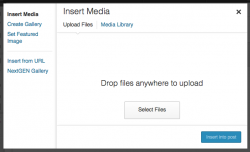
- Click on the Add Media button (figure 1) and select an image from your computer (Select Files)
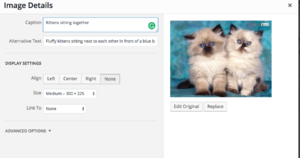
- Customize the image size, alignment, caption
- Click Insert into post
Adding Alt Text to Images
- In the Page or Post, click on the image once to highlight it.
- From the pop-up mini-menu, click on the Edit (pencil icon) button.
- At the Image Details page, enter a description of the image in the Alternative Text field.
- Click the blue Update button in the lower right corner to save.


